Supplies:
- Crayola Broad Line Markers
- Crayola Marker & Watercolour Paper - 22.9 cm x 30.5 cm (9" x 12")
- Crayola Crayons
- Crayola Scissors
- Write-On Transparency Film or Plastic File Folders cut into rectangles - 14 cm x 21.5 cm (5 ½" x 8 ½") - 1 per student
- Masking Tape
- Small Pieces of Sponge - about 3 cm x 3 cm (1 ¼"x 1 ¼") - 1 per student
- Paper Towels
- Water Containers
Steps:
1
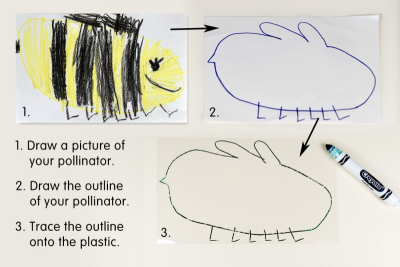
- Draw a picture of your pollinator on a 14 cm x 21.5 cm (5 ½" x 8 ½") piece of paper.
- Make it fill the whole paper.
- Draw just the outline of your pollinator on a new paper.
- Use a marker to trace the outline of your pollinator on the plastic rectangle.
2
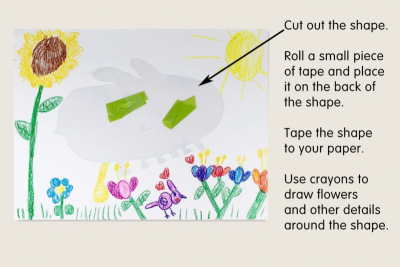
- Cut out the shape.
- Clean the marker off the plastic shape with a tissue.
- Roll a piece of masking tape with the sticky side facing out to make a cylinder.
- Place it on the back of the plastic shape.
- Fasten the shape to your paper.
- Use crayons to colour things your pollinator likes around the plastic shape.
- Press hard with the crayon.
- Leave some paper white.
3
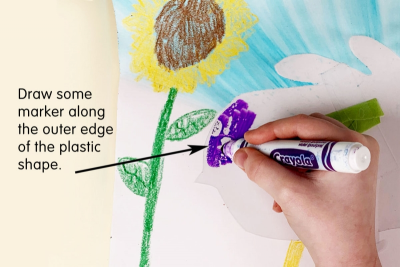
- Draw some marker along the outer edge of the plastic shape.
4
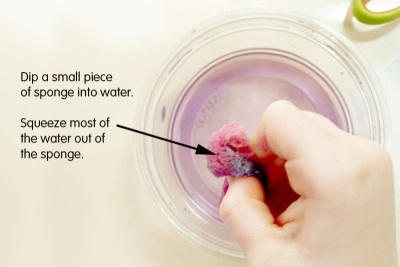
- Dip a small piece of sponge into water.
- Squeeze most of the water out of the sponge.
- The sponge should be damp not wet or the colours will be very pale.
5
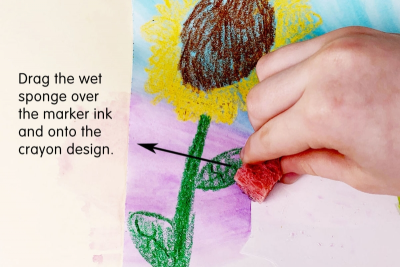
- Drag the wet sponge over the marker ink and onto the crayon design.
- Continue in this way until the outer frame is complete.
6
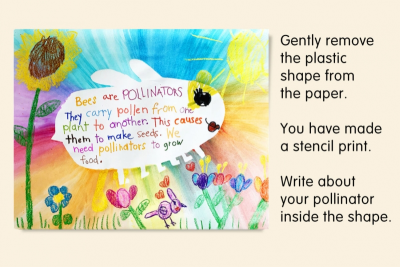
- Gently remove the plastic shape from the paper.
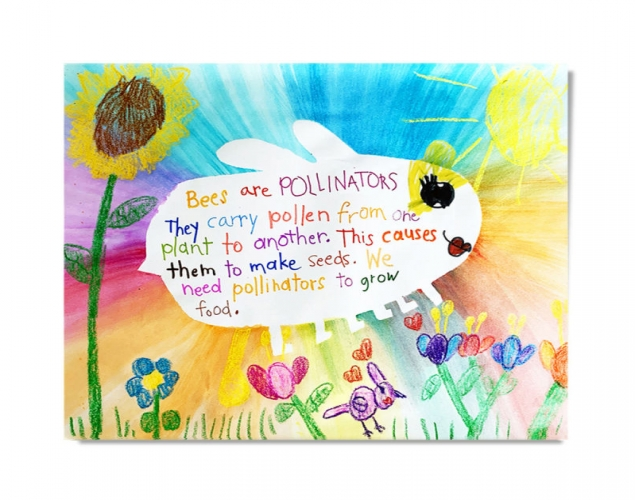
- You have made a stencil print.
- Write about your pollinator inside the shape.
- View your work with fresh eyes.
- The words tell us things about pollinators.
- What more can we learn from the colours and details you drew?
- What do you like best about your work? Why?
Subjects:
Grades:
Grade 1,
Grade 2,
Grade 3

