Supplies:
- Crayola Tempera Paint
- Crayola Paint Brushes
- Crayola Scissors
- Rulers
- Pencils
- Erasers
- Bristol Board or Painting Paper - 30.5 cm x 30.5 cm (12" x 12") - 1 per student
- Paper Towels
- Water Containers
- Plastic Lids for Palettes
- Photograph of Self - or Image to Represent Self
Steps:
1
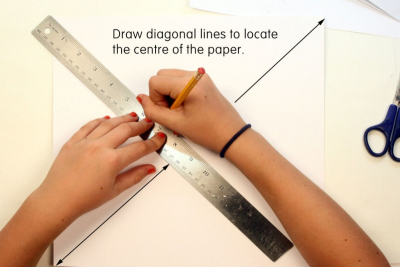
- Lightly draw diagonal lines from corner to corner on the Bristol board to locate the centre.
2

- Cut out a circle with a 20 cm (8") diameter.
3
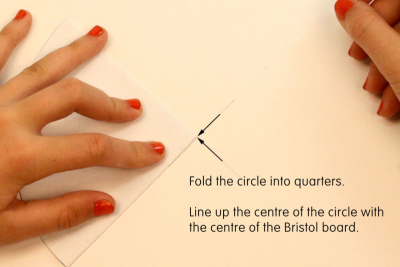
- Fold the circle into quarters to find the centre.
- Line up the centre of the circle with the centre of the Bristol board.
4
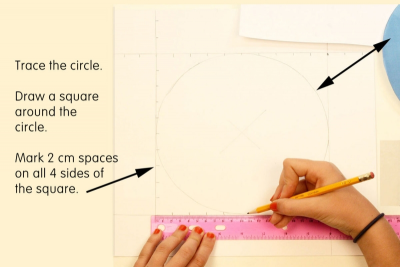
- Open the paper circle and trace it onto the Bristol board.
- Draw a square around the circle.
- Mark 2 cm (1") intervals on all 4 sides of the square.
5
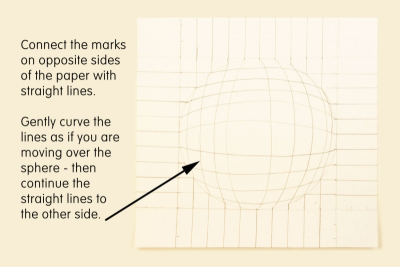
- Connect the marks on opposite sides of the Bristol board with straight lines.
- When you come to the circle gently curve the line as if you are moving over the surface of a sphere, then continue to the other mark in a straight line.
6
- Scan or download a photograph of yourself.
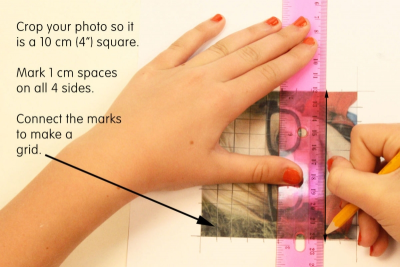
- Crop your photograph so it is a 10 cm (4") square and shows a close-up of your face.
- Print the photograph.
- Mark 1 cm intervals on all 4 sides of your photograph.
- Connect the marks opposite each other to form a grid.
7
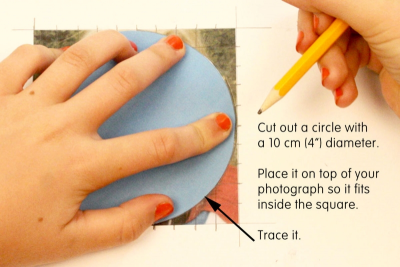
- Cut out a circle with a 10 cm (4") diameter.
- Place it over your photograph and trace it.
8
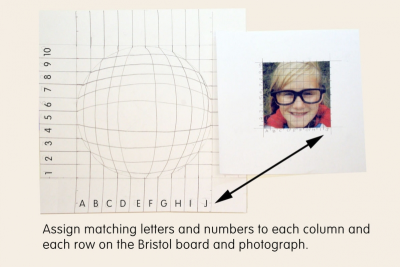
- Assign a letter to each column of the grid on the Bristol board and a number to each row.
- Assign matching letters and numbers to the columns and rows of the grid on your photograph.
9
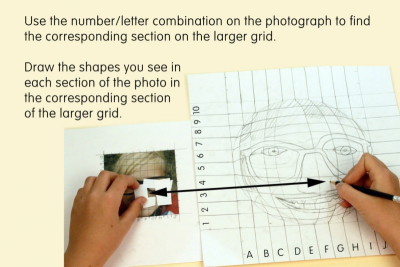
- Decide where to start drawing.
- Look at the box that contains your starting point and find the corresponding box on the bigger paper, e.g., 4G.
- Copy the details in that box.
- You may want to place small pieces of paper strips along the edges of the box you are working on to help you see only those details.
- Continue drawing from box to box until you have finished all the details.
10
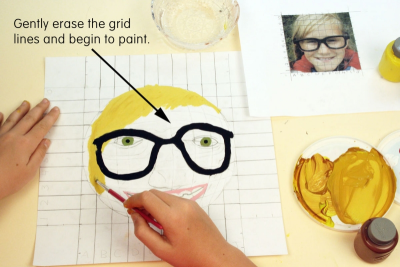
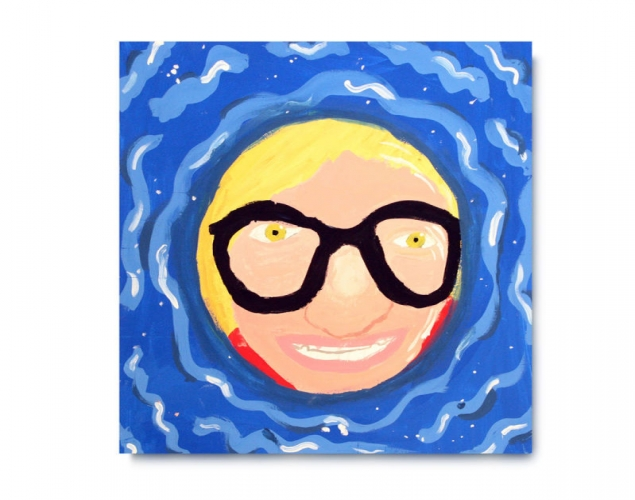
- Gently erase the grid lines and begin to paint.
- Mix a range of colours to show light and shadow.
11
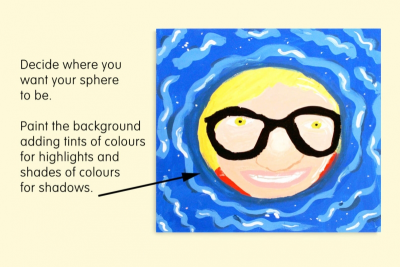
- Decide where you want your sphere to be.
- Paint the background adding tints of colours for highlights and shades of colours for shadows.
Subjects:
Language Arts,
Mathematics,
Visual Arts
Grades:
Grade 6,
Grade 7,
Grade 8,
Grade 9