
Supplies:
- Crayola Non-Washable Broad Line Markers - 10 Count
- Crayola Scissors
- Crayola Washable No-Run School Glue
- Crayola Coloured Pencils - 12 Count
- Spray Water Bottle
- Cardstock Paper - White
- Coffee Filters - White - 6 per student
- Cardboard Picture Frame - 1 per student
- Picture of Student
Steps:
1
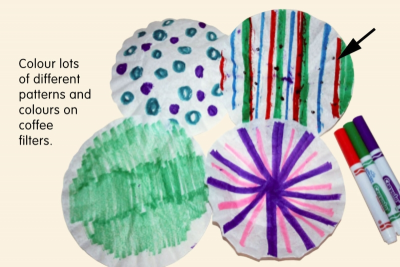
- Colour lots of different patterns and colours on about 6 coffee filters.
- Try lots of different ways to add colours, for example, use:
- only primary colours
- only non-primary colours
- 1 colour
- 2 colours
- 3 colours
2
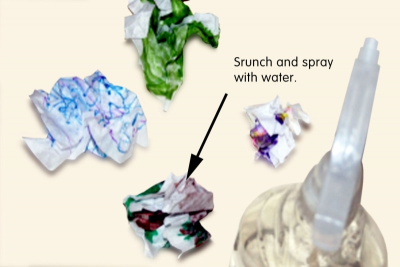
- Scrunch the coloured coffee filters into balls.
- Place them onto a washable surface, such as a plastic tablecloth or garbage bag.
- Spray the coffee filters about 3 times.
- Turn the coffee filters over after the first spray to make sure the whole filter gets wet.
3
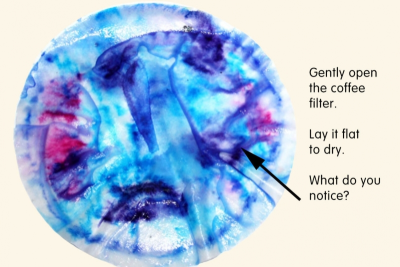
- Gently open each coffee filter and lay it flat to dry.
- What do you notice?
- What kinds of patterns do you see?
- What happened with the primary colours?
- What happened with the other colours? - Allow the coffee filters to dry overnight.
4
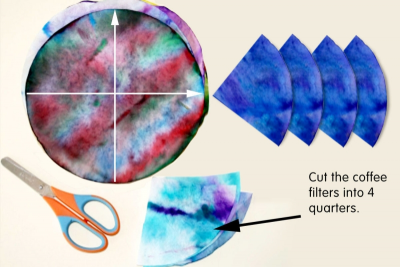
- Cut the coffee filters into 4 quarters.
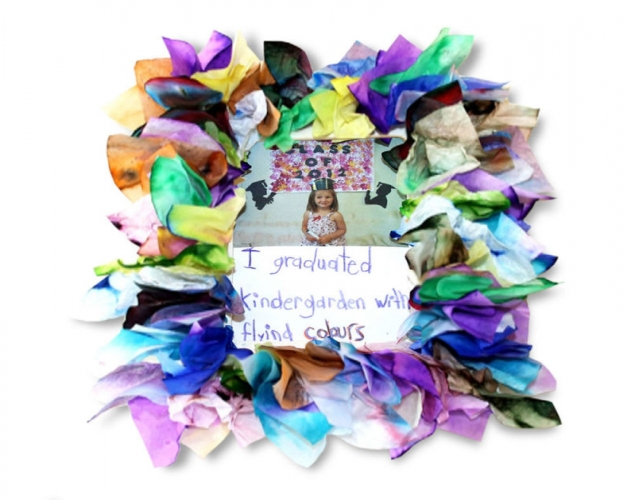
5
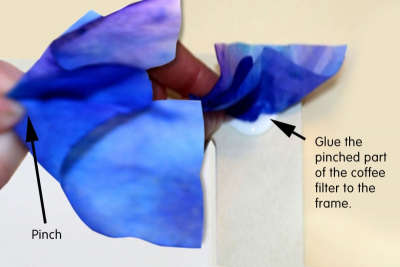
- Choose one of the coffee filter quarters.
- Pinch the centre and glue the pinched part onto the frame.
- Continue gluing the coloured quarters all the way around the frame.
- Make sure you fill the entire frame with coloured quarters.
- You shouldn’t see any of the frame once you have finished.
6
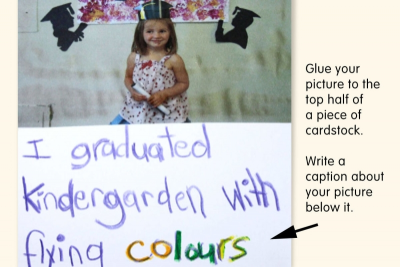
- Practice writing a caption about your picture on a scrap of paper.
- Glue your picture onto the top half of a piece of card stock paper.
- Write your caption below it.
7
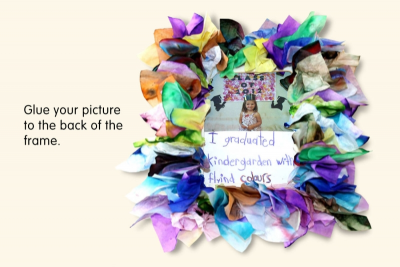
- Glue the picture to the back of the frame.
- View your frame with fresh eyes.
- What do you like best about it? Why?
- Who would love this frame? Why?
- How does the frame make your picture look?
- What did you learn about colours while making this frame?
Subjects:
Language Arts,
Mathematics,
Visual Arts
Grades:
Pre-Kindergarten,
Kindergarten