Supplies:
- Crayola Watercolour Paints - 8 Count
- Crayola Paintbrushes - 5 Count
- Crayola Marker & Watercolour Paper - 22.9 cm x 30.5 cm (9" x 12")
- Crayola Regular Crayons - White
- 2 Sizes of Circle Tracers - 9 cm diameter & 7.5 diameter (3 ½" & 3")
- Pencils
- Rulers
- Water Containers
- Paper Towels
Steps:
1
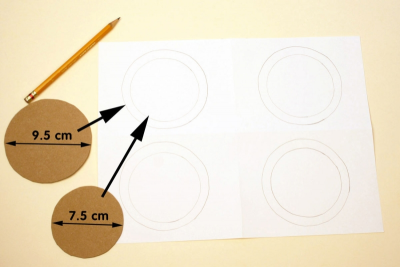
- Fold your paper in half long end to long end.
- Open the paper and fold it in half again this time short end to short end.
- You should have 4 equal rectangles.
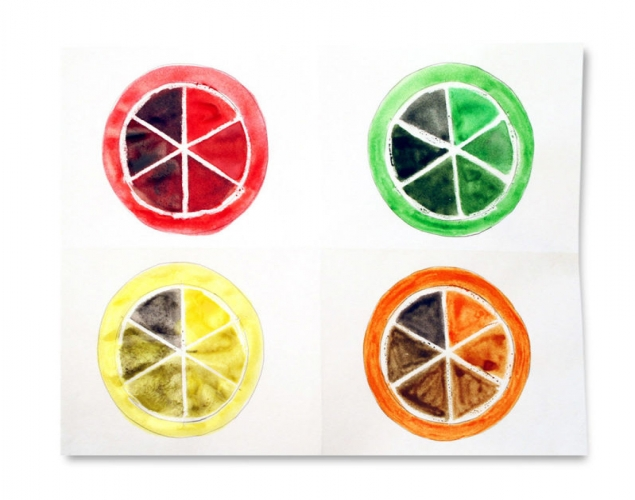
- Use the big circle tracer to draw a circle in each rectangle.
- Use the small circle tracer to draw a circle inside the big circle so the centres line up.
- This will become the rind or skin of your fruits.
2
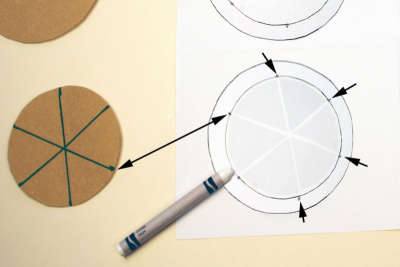
- Use the lines on the small circle tracer to mark 6 dots around the outside edge of the small circles you drew on your paper.
- Use a white crayon and a ruler to connect the dots across from each other.
- Colour around the edge of the small circle with the white crayon.
- The white crayon will resist the paint and make a border around each section after it is painted.
3
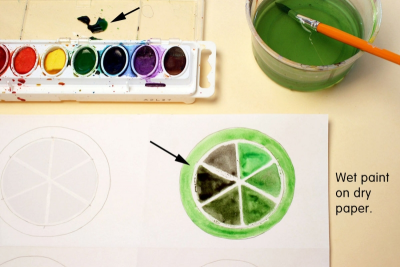
- Make a small puddle of green paint in the lid of the paint box.
- Do all your mixing with this paint.
- Paint directly on the dry paper.
- Use green paint to paint the first section of the lime.
- Gradually add a small amount of black paint so that each slice is slightly darker than the one before it.
- The 6th or final section should be pure black.
- Clean your brush and paint box lid with paper towel.
- Get clean water.
- Repeat the painting process for one of the other circles using orange paint.
4
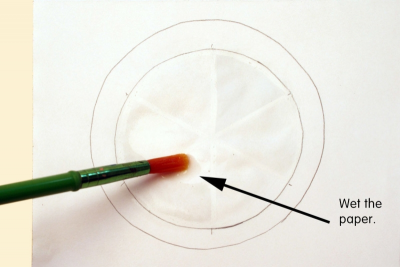
- For the remaining 2 circles first wet the paper before adding paint.
- Make sure the water is clear.
5
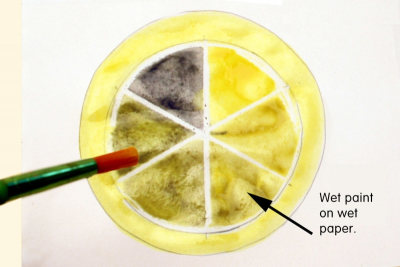
- Notice how the paint flows on the paper.
- How is this different than painting on dry paper?
- Repeat the process using red paint for the last circle.
6
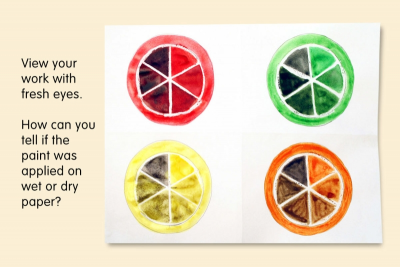
- View your finished work with fresh eyes.
- How can you tell if the paint was applied on dry or wet paper?
- What did you learn about mixing shades?
- What fruits do these circles remind you of? Why?
- What do you like best about your painting?
Subjects:
Language Arts,
Mathematics,
Visual Arts
Grades:
Grade 1,
Grade 2,
Grade 3

