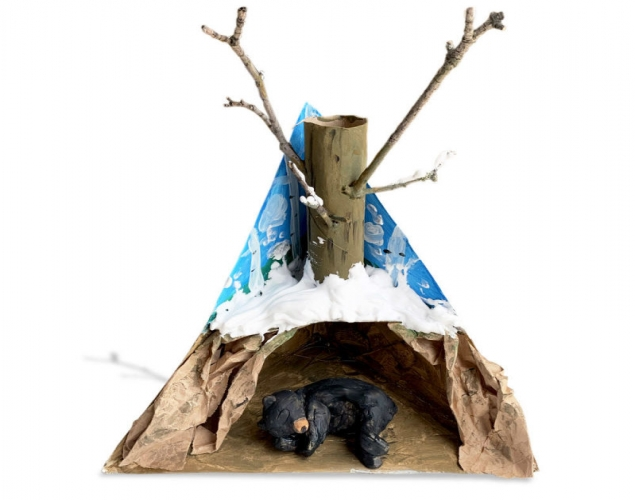
Supplies:
- Crayola Scissors
- Crayola Construction Paper - 22.9 cm x 30.5 cm (9" x 11")
- Crayola Glue Sticks
- Crayola Fine Line Markers
- Pencils
- Lined Paper
- Cardstock Paper - 6.3 cm x 27.9 cm (2.5" x 11") - 1 per student
Steps:
1
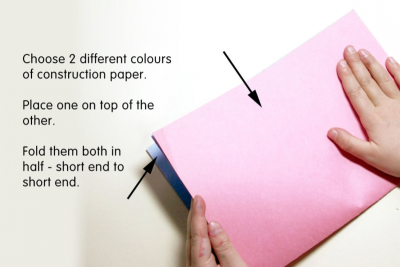
- Choose two different colours of construction paper.
- Place one on top of the other.
- Fold them both in half, short end to short end.
2
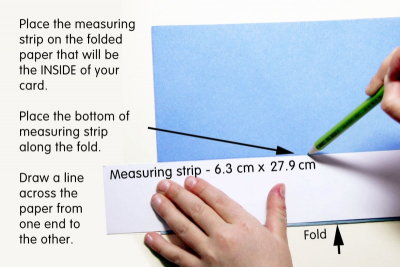
- Place the paper that will be the outside of your card aside.
- Place the measuring strip on the folded paper that will be the inside of your card.
- Place the bottom of the measuring strip along the fold.
- Draw a line across the construction paper from one end to the other parallel to the fold.
3
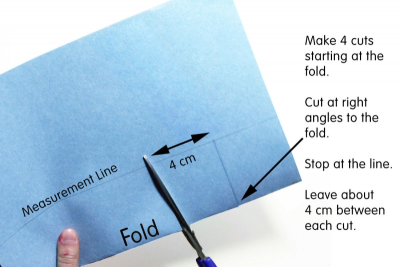
- Make 4 cuts starting at the fold.
- Cut at right angles to the fold.
- Stop at the line.
- Leave about 4cm between each cut.
4
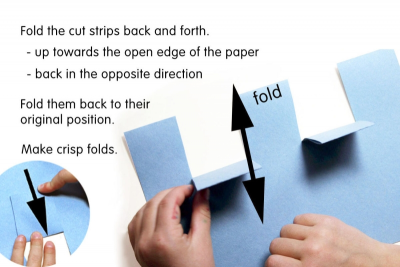
- Fold the cut strips back and forth.
- up towards the open edge of the paper
- back in the opposite direction - Make firm, crisp folds.
- Then fold them forward again so they are back in their original position before you made any cuts.
5
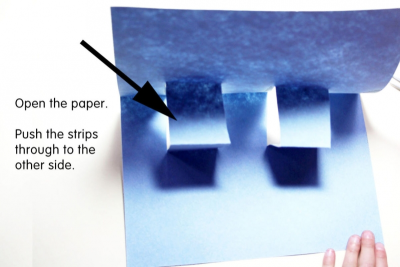
- Open the paper.
- Push the strips through to the other side.
6
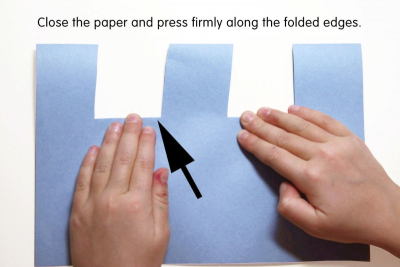
- Close the paper.
- Press firmly along the folded edges.
7
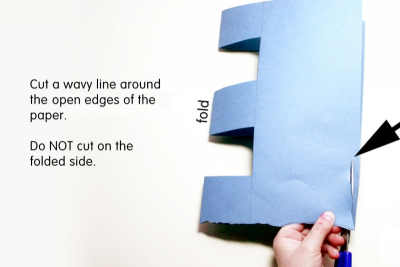
- Cut a wavy border around the open edges of the paper.
- Do NOT cut on the folded side.
8
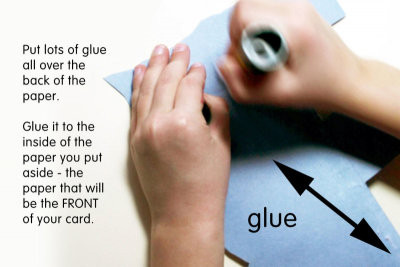
- Put lots of glue all over the back of the paper.
- Glue it to the inside of the paper you put aside – the paper that will be the front of your card.
9
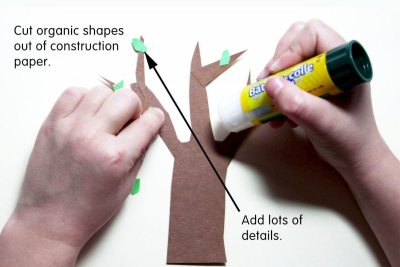
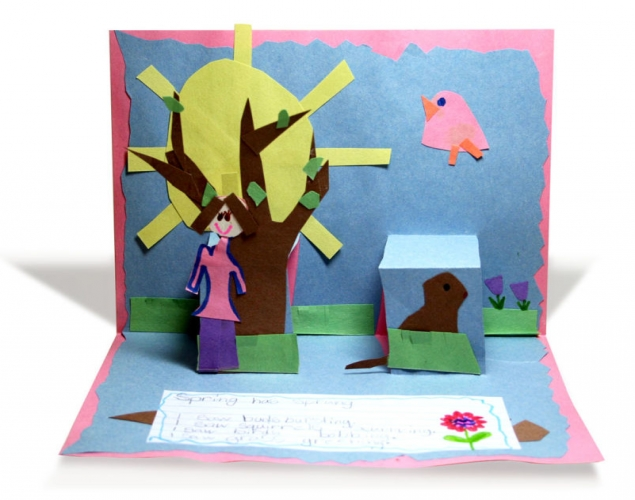
- Cut organic shapes out of construction paper.
- Add lots of details to show the signs of spring that will be in your story.
10
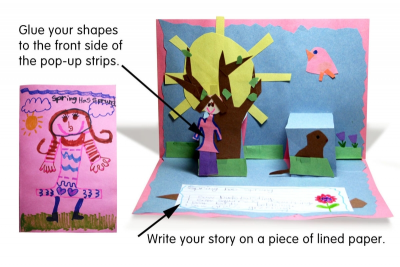
- Glue your shapes to the front side of the pop-up strips.
- Add lots of details to the background as well.
- Write your story on a small piece of lined paper.
- Use markers to decorate the paper.
- Glue the story inside the card in front of your pop-up figures.
- Use markers or crayons to decorate the cover of the card.
- When you open the card your pictures will pop up.
Subjects:
Language Arts,
Mathematics,
Science,
Visual Arts
Grades:
Grade 1,
Grade 2,
Grade 3

