
Supplies:
- Crayola Paint Brushes
- Crayola Washable No-Run School Glue
- Crayola Scissors
- Crayola Broad Line Markers
- Crayola Tempera Paint
- Cereal Boxes
- Scrap Corrugated Cardboard
- Water Containers
- Paper Towels
- Rulers
Steps:
1
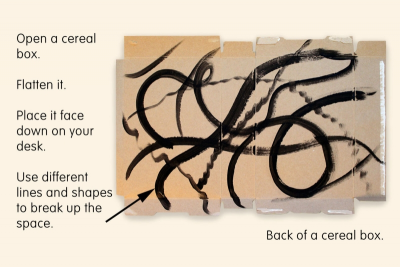
- Open a cereal box and flatten it.
- Place it face down on the desk.
- Use different lines and shapes to break up the space.
2
- Let your imagination flow.
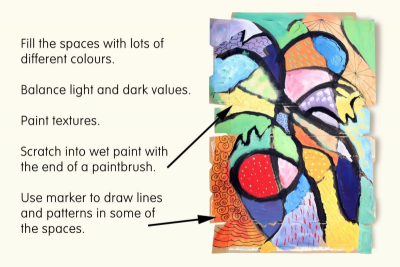
- Fill the spaces with lots of different colours.
- Balance light and dark values.
- Paint different textures.
- Scratch into the wet paint with the end of a paintbrush to create textures.
- Use marker to draw lines and patterns in some of the spaces.
3

- Place the painting face down on the desk.
- Divide the back of the painting into 7.5 cm (3") squares.
- Draw the lines with a marker.
4
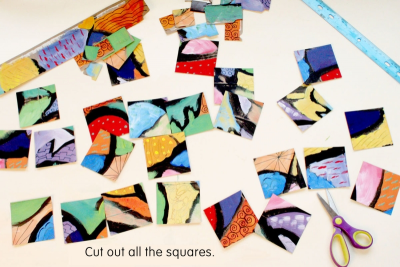
- Cut out all the squares.
- Spread them out on the desk paint side up.
5
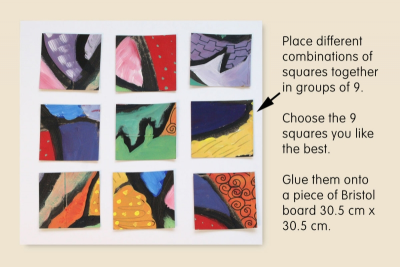
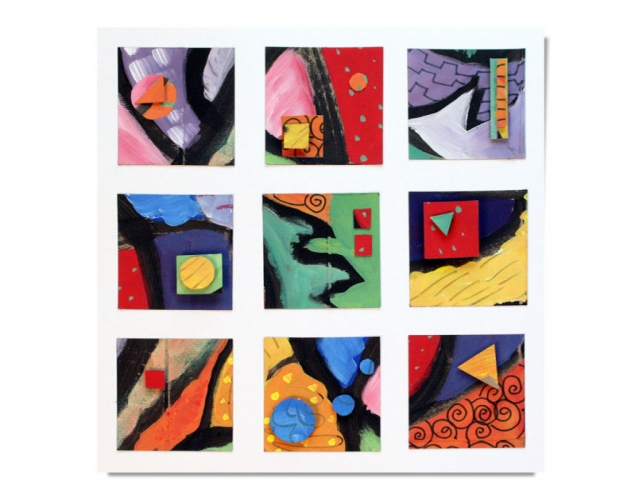
- Place different combinations of squares together in groups of 9.
- Look for how the colours, lines and shapes lead your eye through the composition.
- Choose the 9 squares you like best.
- Glue them onto a piece of Bristol board 30.5 cm x 30.5 cm (12" x 12").
6
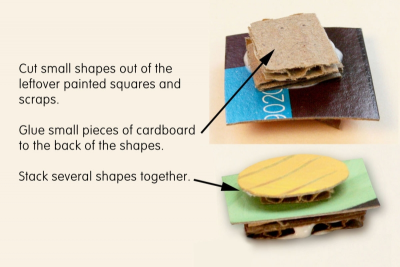
- Cut small shapes out of the leftover painted squares and scraps.
- Glue small pieces of cardboard to the back of the shapes.
- Stack several shapes together.
7
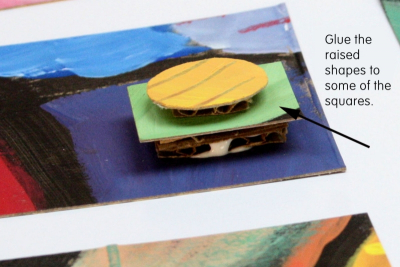
- Use white glue to attach the raised shapes to the squares.
- Place them so the colours contrast with the shapes below.
- Make sure the lines, colours and shapes lead your eye through the composition.
8
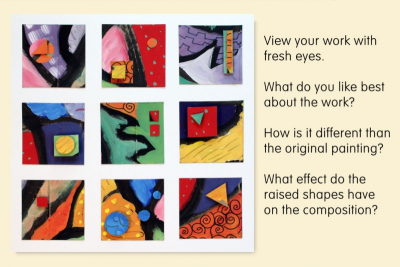
- View your finished painting collage with fresh eyes.
- What do you like best about the work?
- How is it different than the original painting?
- What effect do the raised shapes have on the composition?
Subjects:
Language Arts,
Mathematics,
Visual Arts
Grades:
Grade 4,
Grade 5,
Grade 6,
Grade 7,
Grade 8,
Grade 9