Supplies:
- Crayola Marker & Watercolour Paper - 22.9 cm x 30.5 cm (9" x 12")
- Crayola Tempera Paint
- Crayola Paint Brushes
- Masking Tape
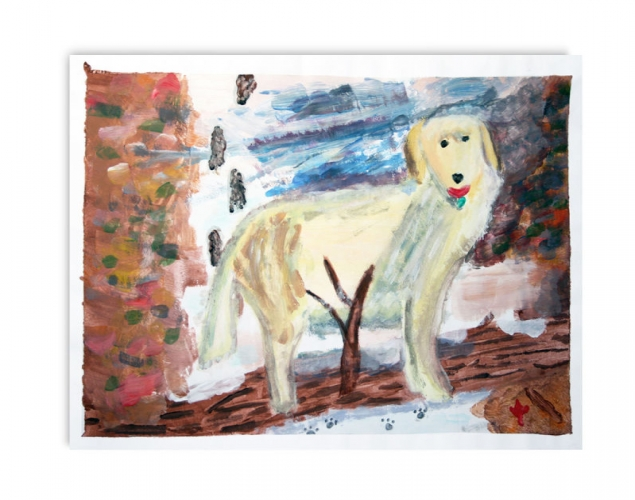
- Photograph of a Pet
- Pencils
- Rulers
- Plastic Placemats
Steps:
1
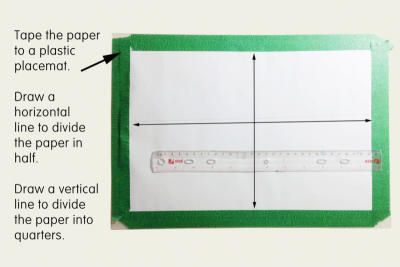
- Tape your paper to a plastic mat.
- This will keep the paper smooth and flat while you work.
- When the tape is removed it will create a white border around the painting. - Draw a horizontal line to divide the paper in half.
- Draw a vertical line to divide the paper into 4 quarters.
2

- Use 2 'L' shaped pieces of card as a viewfinder.
- Place them on the photograph to crop the picture.
- Move the viewfinder around until you are happy with the composition of the picture.
- Make sure your cropped photograph is roughly the same shape and proportions as your painting paper.
- This is the picture you will be painting.
- When you are happy with the placement of the viewfinder tape it in place.
3
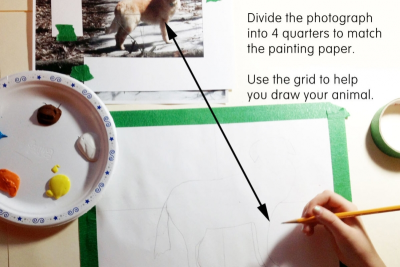
- Divide the photograph into 4 quarters to match the painting paper.
- Use this grid to help you draw your animal.
- Start in one of the boxes.
- Look at where the outer edge of the animal begins and ends.
- Outline the same edge in the matching box on your painting paper.
- You are using a big grid to help you see the space.
- Don't worry if it is not perfect.
- For this painting you just need to block in the main objects to get you started.
4
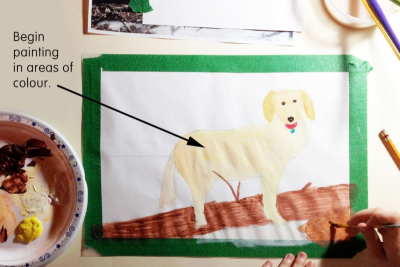
- Begin painting in areas of colour.
- The photograph is just a way to get started.
- Don't be afraid to add effects that are not in the photograph.
- Let your imagination guide you.
5
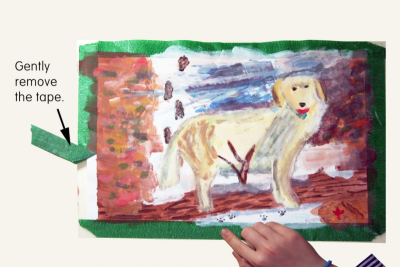
- Build up colour and texture.
- Work with areas of contrast to make the animal stand out in the space.
- From time to time stop and look at the painting from a distance to see it with fresh eyes.
- When you are satisfied with your work and the paint is dry gently remove the tape.
6
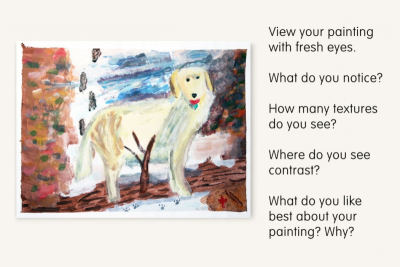
- View your painting with fresh eyes.
- What do you notice?
- How many textures do you see?
- Where do you see contrast?
- What do you like best about your painting? Why?
- Who would love this painting? Why?
Subjects:
Grades:
Grade 4,
Grade 5,
Grade 6,
Grade 7,
Grade 8,
Grade 9