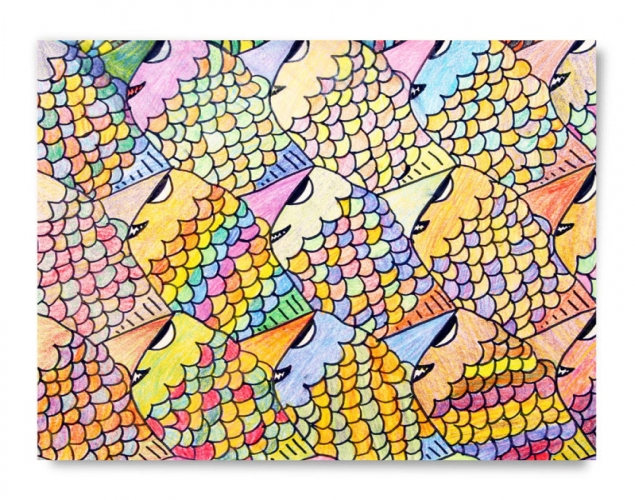
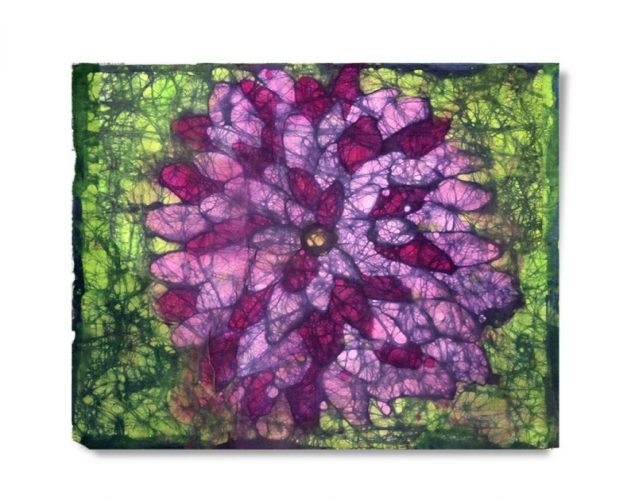
PLANTS IN NATURE – The Ancient Art of Batik on FabricStudents learn about the ancient art of batik and use a simplified, melted crayon on fabric process to create their own design of the close-up view of a plant. CAUTION! This technique should only be done in a well ventilated room and with adult supervision.
Students learn about the ancient art of batik and use a simplified, melted crayon on fabric process to create their own design of the close-up view of a plant. CAUTION! This technique should only be done in a well ventilated room and with adult supervision.
Supplies:
- Crayola Crayons - 24 Count
- Crayola Erasable Coloured Pencils - 12 Count
- Crayola Paint Brushes - 5 Count
- White Cotton Fabric - 22.9 x 30.5 cm (9" x 12") - 1 piece per student
- Old Electric Frying Pan
- Mini Muffin Tin - 12 Count
- Masking Tape
- Iron
- Bristol Board - 25.4 cm x 33 cm (10" x 13") - 1 per student
- Recycled Newspapers
- Dark Blue Cold Water Fabric Dye - Indigo
- Rubber Gloves
- Large Plastic Basin
Steps:
1
- Tape all 4 sides of the fabric to a piece of paper or tag manila.
- Pull the edges tight as you tape them down to give a smooth surface.
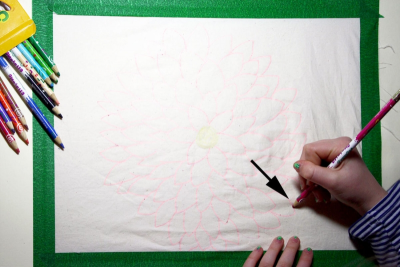
- Refer to your picture or rough sketch.
- Use erasable coloured pencils to draw the main details of your design onto the fabric.
2
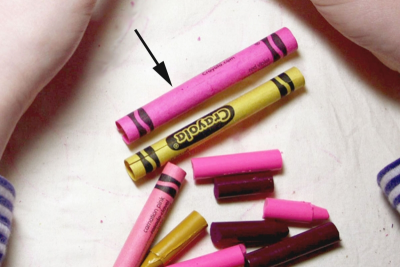
- Select the colours of crayons you need for your design.
- Remove the papers and break the crayons in half.
3
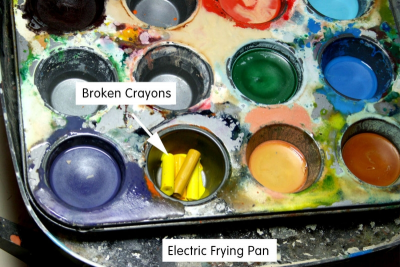
- Place a muffin tin into the electric frying pan.
- Place the broken crayons into one of the muffin tin spots.
- Continue to do this until you have all the colours you need in your palette.
- Set the temperature to medium.
- Always have water in the pan when the crayons are melting.
4
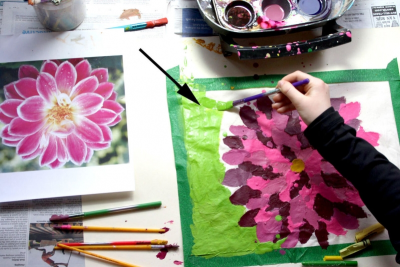
- Paint with the melted wax crayon.
- Make sure the colour is hot enough to melt into the fabric.
- Be sure to fill the entire surface of the fabric with melted wax crayon.
5
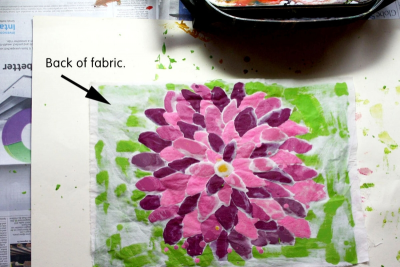
- When you are finished remove the tape.
- Turn the fabric over.
- Add more melted wax crayon to any fabric not coated with colour.
6

- Crumple the fabric in your hands.
- Make as many cracks in the wax crayon as possible.
- Unfold the fabric.
7
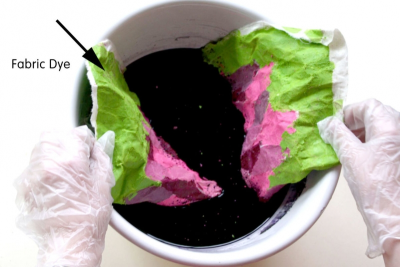
Be sure to wear plastic gloves to protect your hands and an apron to protect your clothes.
- Place the entire fabric into a basin of dark blue, cold water fabric dye.
- Scrunch the fabric down into the basin.
- Squeeze out the excess dye before you remove it.
8
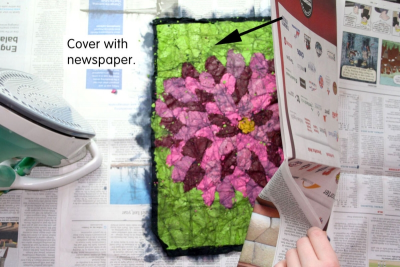
- Flatten the fabric on a piece of newspaper.
- Place several pieces of newspaper on top of the fabric.
9
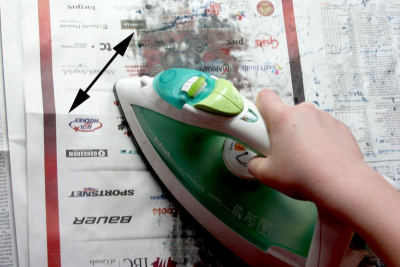
- Set the iron to cotton.
- Slowly move the iron over the newspaper to remove the wax.
- Keep the iron moving and stop when the newspaper is full of melted wax.
- Repeat, using fresh newspaper until all the wax is removed.
- When you no longer see wax on the newspaper you are finished.
10
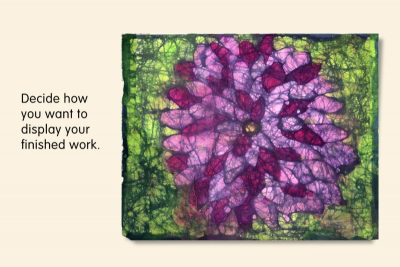
- Decide how you want to display your finished work.
Subjects:
Language Arts,
Science,
Social Studies,
Visual Arts
Grades:
Grade 6,
Grade 7,
Grade 8,
Grade 9