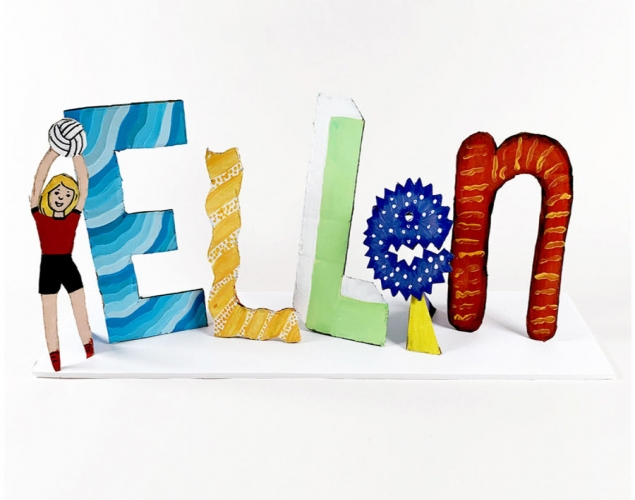
NAME SCULPTURE – Colour, Pattern, AnglesStudents design decorative letters for their name, cut them out of corrugated cardboard, paint them with a variety of patterns and use the letters to construct a sculpture that places the letters at different angles and includes something that represents them.
Students design decorative letters for their name, cut them out of corrugated cardboard, paint them with a variety of patterns and use the letters to construct a sculpture that places the letters at different angles and includes something that represents them.
Supplies:
- Crayola Paint Brushes
- Crayola Acrylic or Tempera Paint
- Crayola White Glue
- Crayola Scissors
- Corrugated Cardboard
- Rulers
- Pencils
- Erasers
- Water Containers
- Paper Towels
- Plastic Container Lids for Palettes
Steps:
1
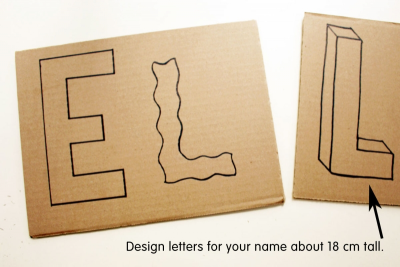
- Design different styles of letters for your name.
- Make most of them about 15 - 18 cm tall.
- Draw them on pieces of corrugated cardboard.
2
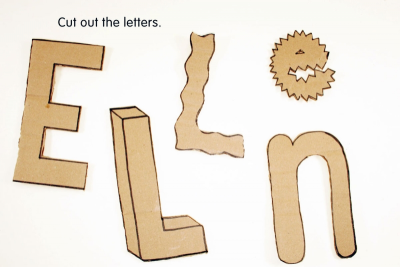
- Carefully cut out all the letters.
3
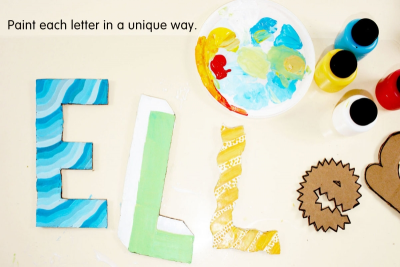
- Paint each letter in a unique way.
- Paint the front and back of all the letters.
4
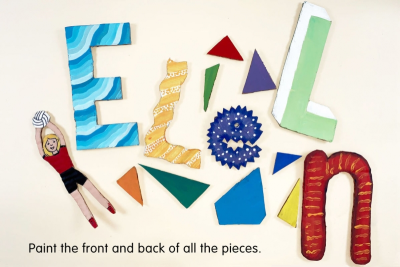
- Cut out a variety of triangles and other polygons with different angles.
- Make something that represents you, for example, a figure playing volley ball.
- Paint both sides of everything.
5
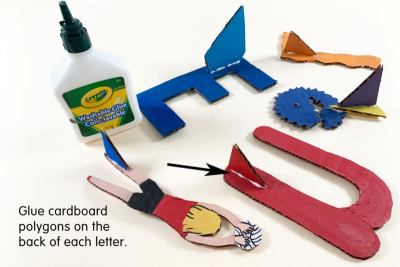
- Test different polygons to see what kind of an angle they will create if you use them to support a letter.
- Choose the angles you want to use.
- Glue the polygons onto the back of each letter and any other pieces.
- Place them even with the bottom of the shapes.
- Allow the glue to dry for a few minutes.
6
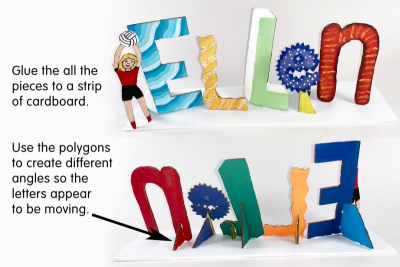
- Arrange the pieces on a strip of cardboard or foam core board.
- Use the polygons to create different angles as they support up the letters.
- Space the letters so they move your eye in and around the sculpture.
- Glue everything in place.
7
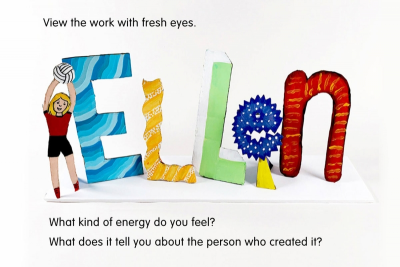
- View the work with fresh eyes.
- What kind of energy do you feel?
- What do you see that makes you say that?
- What does it tell you about the person who created it?
- What do you see that makes you say that?
- What do you notice about the way the work has been made?
- What do you like the best about this work?
Subjects:
Language Arts,
Mathematics,
Science,
Visual Arts
Grades:
Grade 4,
Grade 5,
Grade 6,
Grade 7,
Grade 8