Supplies:
- Crayola Scissors
- Crayola Construction Paper - 22.9 cm x 30.5 cm (9" x 12")
- Crayola Washable No-Run School Glue
- Crayola Paintbrush Set - 5 Count
- Crayola Washable Project Paint
- Small Paper Lunch Bag - 1 per student
- Recycled Plastic Bags or Newspapers
- Water Containers
- Paper Towels
- Bristol Board 30.5 cm x 30.5 cm (12" x 12") - 1 per student
Steps:
1
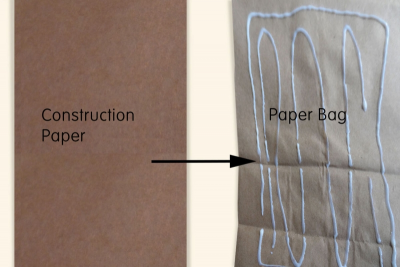
- Choose a piece of construction paper in a colour similar to your house.
- Cut the construction paper the size of the front of your paper bag.
- Glue the construction paper onto the front of your paper bag.
- This will be the front of your house.
2
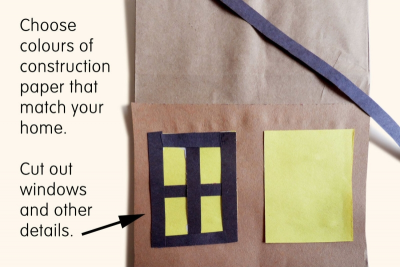
- Choose colours of construction paper that match your house.
- Cut out windows and other details.
- Try to make the size, shape and location of your details match those in your own house.
- Cut out large shapes for the main objects.
- Cut out narrow strips of construction paper to frame the large shapes.
- Glue everything in place making sure the paper sticks firmly to the paper.
3
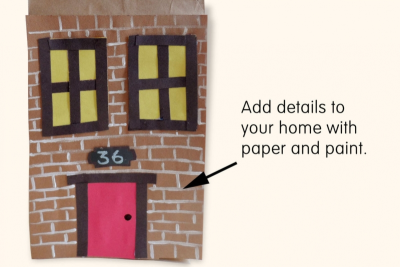
- Add other details, such as bricks and numbers with paint.
4
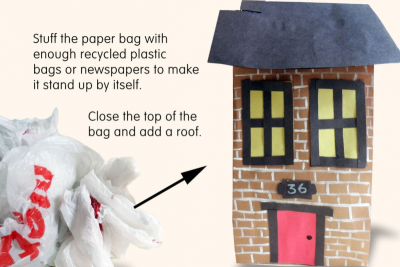
- Stuff the paper bag with recycled plastic bags or newspapers.
- Make sure you fill it with enough stuffing to support your house so it will stand without falling over.
- Glue the top of the bag shut.
- Fold a piece of construction paper in half to make a roof.
- Glue it in place.
5
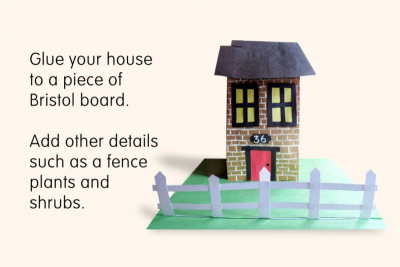
- Glue your house to a Bristol board base.
- Add other details such as a fence, plants and shrubs.
- View your model with fresh eyes.
- Does it look like your own house?
- How do the details make the model look realistic?
- What is your favourite part of the model? Why?
Subjects:
Language Arts,
Social Studies,
Visual Arts
Grades:
Kindergarten,
Grade 1,
Grade 2,
Grade 3