Supplies:
- Crayola Modeling Clay - Jumbo Pack
- Crayola Scissors
- Aluminum Foil
- Bamboo Skewers - 1 per student
- Toothpicks
- Rolling Pins
- Rulers
Steps:
1
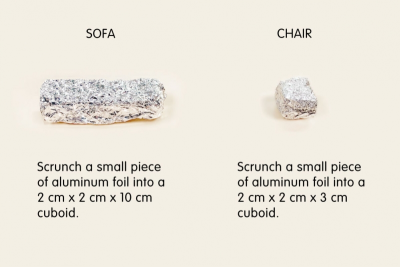
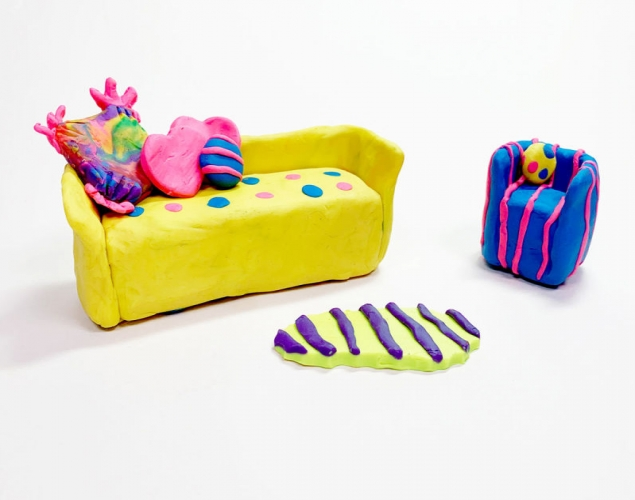
Sofa and chair suitable for a 10 cm (4") tall figure.
- Scrunch a small piece of aluminum foil into a 2 cm x 2 cm x 10 cm cuboid for the sofa seat.
- Scrunch a small piece of aluminum foil into a 2 cm x 2 cm x 3 cm cuboid for the chair seat.
2
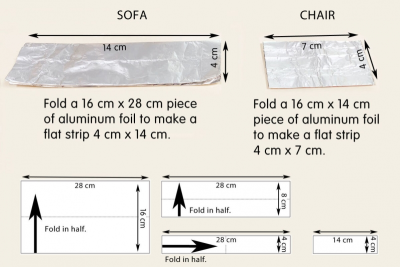
SOFA
- Use a piece of 16 cm x 28 cm aluminum foil.
- Fold it in half long end to long end.
- Fold it in half again long end to long end to make a strip 4 cm x 28 cm.
- Fold that strip in half short end to short end to make a strip 4 cm x 14 cm.
CHAIR
- Use a piece of 14 cm x 16 aluminum foil.
- Fold it in half long end to long end.
- Fold it in half again long end to long end to make a strip 4 cm x 14 cm.
- Fold that strip in half short end to short end to make a strip 4 cm x 7 cm.
3
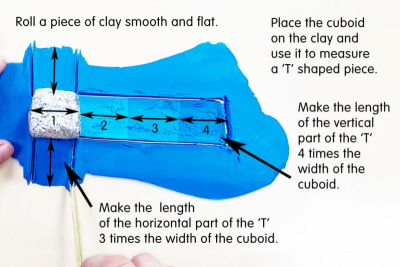
- Roll a piece of clay smooth and flat.
- Make it fairly thin.
- Place the cuboid on the clay and use it to measure a 'T' shaped piece.
- Make the length of the vertical part of the 'T' 4 times the width of the cuboid.
- Make the length of the horizontal part of the 'T' 3 times the width of the cuboid.
- Cut out the shape.
4
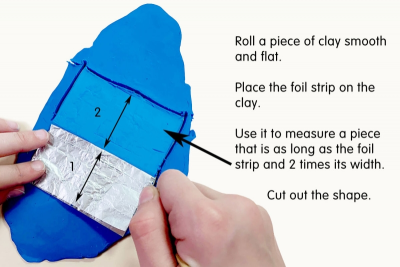
- Roll a piece of clay smooth and flat.
- Make it fairly thin.
- Place the aluminum foil strip on the clay.
- Use it to measure a piece that is as long as the foil strip and 2 times its width.
- Cut out the shape.
5
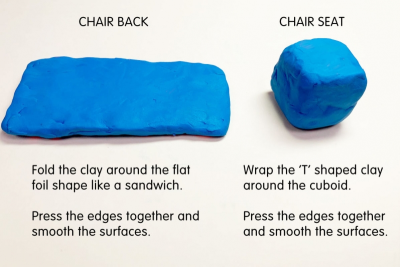
CHAIR BACK
- Fold the clay around the flat foil shape like a sandwich.
- Press the edges together and smooth the surfaces.
CHAIR SEAT
- Wrap the 'T' shaped clay around the cuboid.
- Press the edges together and smooth the surfaces.
6
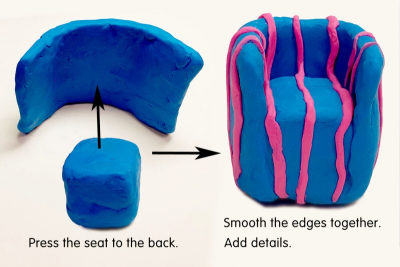
- Press the seat to the back.
- Wrap the shape around the sides of the cuboid to form the arms of the chair.
- Press the edges together and smooth the surfaces.
- Add decorative details and textures.
- Follow the same process to make the sofa.
7
Cushions and Pillows
- Make a small ball and flatten it into a square pillow shape.
- Press small indents in it with your fingers so it looks like a soft pillow.
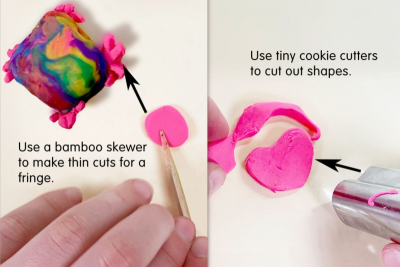
- Make a small ball of contrasting colour and flatten it with your fingers.
- Use a bamboo skewer to press into the circle to make a fringe.
- Flatten small pieces of modeling clay.
- Use tiny cookie cutters or a skewer to cut out shapes.
8
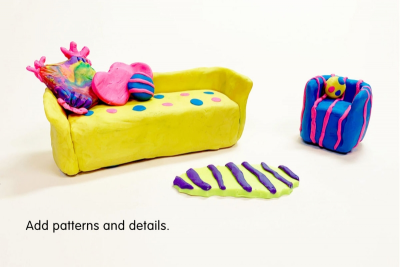
- Add patterns and details.
- Choose colours and details in the sofa that complement the colours and details in the chair.
- Add other items such as cushions, pillows and a rug.
Subjects:
Language Arts,
Mathematics,
Visual Arts,
Media Literacy
Grades:
Grade 4,
Grade 5,
Grade 6,
Grade 7,
Grade 8