Supplies:
- Crayola Construction Paper - 22.9 cm x 30.5 cm (9" x 12")
- Crayola Marker & Watercolour Paper - 22.9 cm x 30.5 cm (9" x 12") - 10 pieces per student
- Crayola Markers
- Crayola Coloured Pencils
- Crayola Crayons
- Corrugated Cardboard - 22.9 cm x 30.5 cm (9" x 12") - 2 pieces per student
- Hole Punch
- Prong Paper Fasteners - 7 cm (2.75") Base - 1 per student
Steps:
1
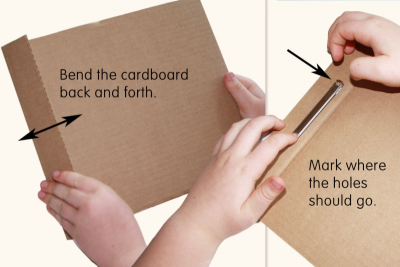
- Find the piece of cardboard with the scored edge.
- Gently fold it back and forth along the scored mark to loosen it up.
- Place the paper fastener in the middle of the thin edge to measure where the holes will go.
- Mark the spots.
2
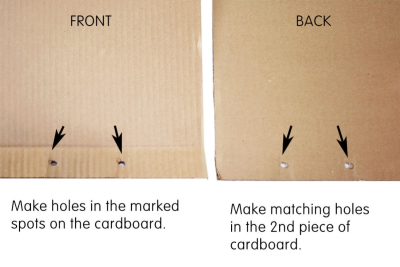
- Use the tip of your scissors or the hole-punch to make the holes in the cardboard.
- Place the cardboard with the holes in it on top of the other piece of cardboard.
- Mark where the matching holes should be.
- Poke or punch holes in the cardboard.
3
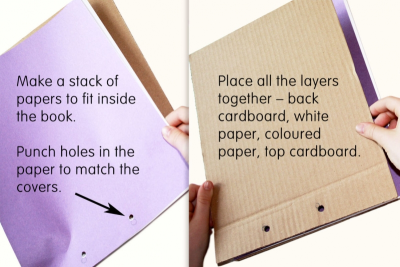
- Make a stack of papers to fit inside the book.
- Punch holes in the paper to match the covers.
- Place all the layers together
- back cardboard
- 10 pieces of white paper
- 1 piece of coloured construction paper
- front cardboard - Make sure everything is lined up evenly.
4
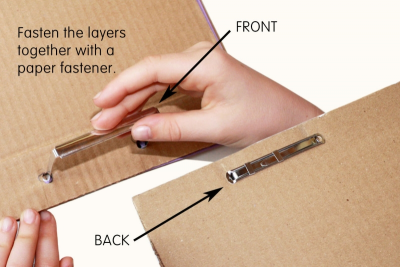
- Fasten the layers together with the prong paper fastener, or use string, ribbon or some other material.
5
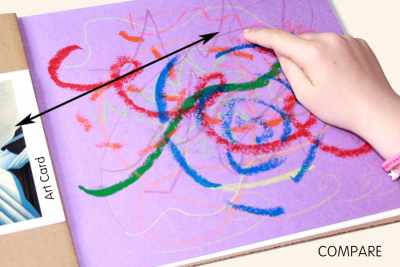
- As soon as you are finished putting the book together begin to make a design.
- Use as many different kinds of lines as you can think of.
- Compare your design with the art card you chose.
- Find 3 ways that your drawing and the art card are the same.
6
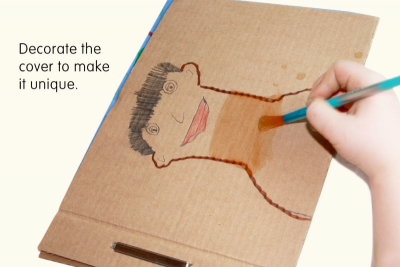
- Use a variety of materials to decorate your cover to make it uniquely yours.
- Use your sketchbook to practise drawing and record your ideas.
Subjects:
Language Arts,
Mathematics,
Visual Arts
Grades:
Grade 1,
Grade 2,
Grade 3,
Grade 7,
Grade 8