Supplies:
- Crayola Model Magic - Primary Colours and White
- Crayola Washable No-Run School Glue
- Crayola Scissors
- Crayola Construction Paper
- Crayola Crayons
- Clothes Pegs
- Cotton Balls
- Pipe Cleaners
- Dried Leaves
- Twigs and Small Branches
- Dried Flowers and Grasses
- Googly Eyes and Other Embellishments
Steps:
1
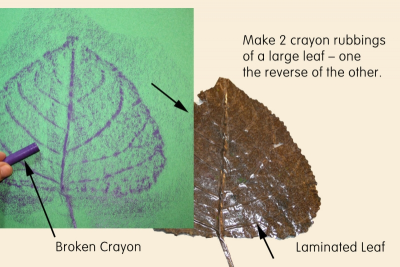
PART ONE - BODY
- Laminate or seal the leaf in some way.
- Place a piece of construction paper on top of the leaf.
- Colour on top of the paper with the side of a broken crayon to make a rubbing of the leaf.
- Remove the paper.
- Turn the leaf over and make a rubbing of it on a new piece of construction paper.
- This rubbing should be the reverse of the first one.
2
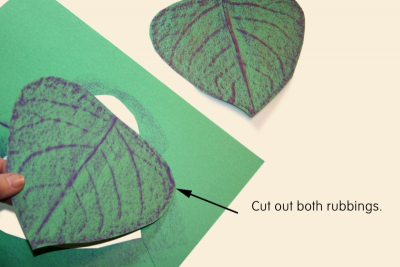
- Cut out both rubbings.
3
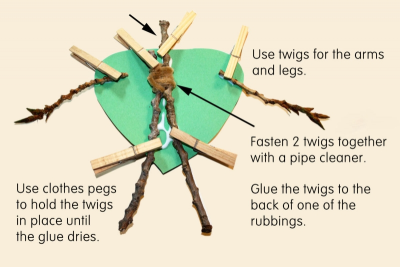
- Glue two twigs to the back of one of the rubbings for arms.
- Use a pipe cleaner to join two longer branches together at one end.
- Use these for the legs and the neck.
- They should be close together at the top, and far apart at the bottom.
- Let one of the branches extend about 3 cm past the other where you join them. - Use clothes pegs to hold the twigs in place until the glue dries.
- Once the glue is dry remove the clothes pegs.
4
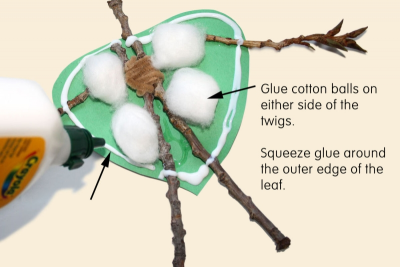
- Glue cotton balls on either side of the branches.
- Squeeze glue around the outer edge of the leaf.
5
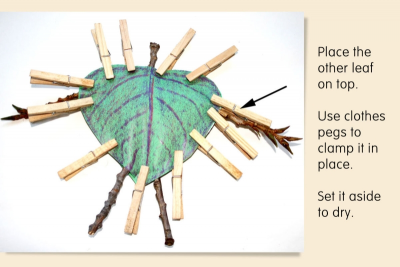
- Place the other leaf rubbing on top.
- Use clothes pegs to clamp it in place.
- Set it aside to dry.
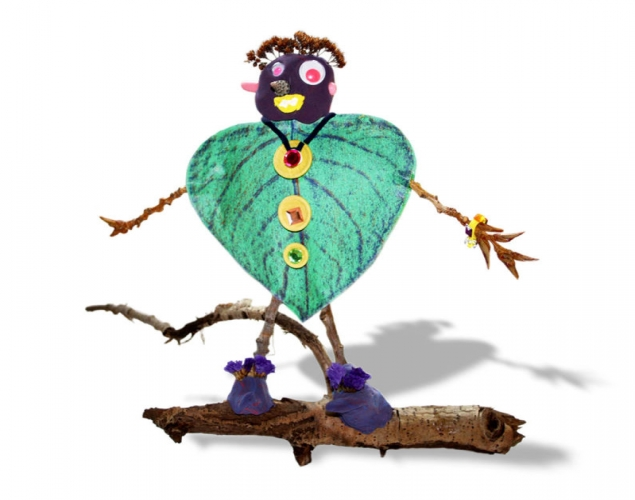
6
PART TWO - HEAD
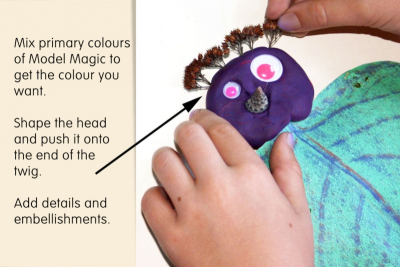
- Mix primary colours of Model Magic to get the colour you want.
- Shape the head and push it onto the stick.
- Make sure the stick goes completely inside and to the top of the Model Magic.
- This will support the head and keep it from falling off. - Add details and embellishments.
7
PART THREE - BASE
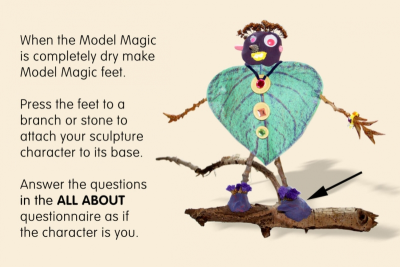
- When the Model Magic is completely dry make Model Magic feet.
- Push the feet onto the ends of the legs.
- Press the Model Magic feet onto a branch or stone to attach your sculpture to it's base.
- The Model Magic should stick when you press it onto the surface, but you may want to add glue to make it extra secure. - View your sculpture character with fresh eyes.
- Answer the questions in the ALL ABOUT questionnaire as if the character is you.
Subjects:
Language Arts,
Mathematics,
Science,
Visual Arts
Grades:
Grade 2,
Grade 3,
Grade 4,
Grade 5,
Grade 6