Supplies:
- Crayola Acrylic Paint, 6 Count
- Crayola Marker & Watercolour Paper - 22.9 cm x 30.5 cm (9" x 12")
- Crayola Variety Brush Set - 5 Count
- Crayola Construction Paper - Green - 22.9 cm x 30.5 cm (9" x 12")
- Masking Tape
- Plastic Placemats - 1 per student
- Water Containers
- Paper Towels
Steps:
1
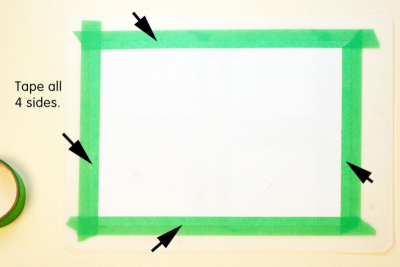
- Tape all 4 sides the paper to a plastic placemat.
- Make sure the tape is straight and runs parallel to the outer edges of the paper.
2
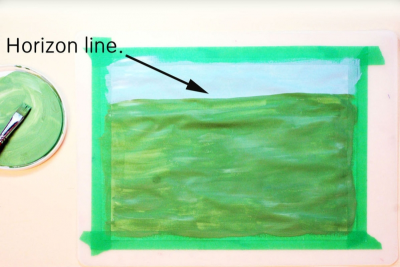
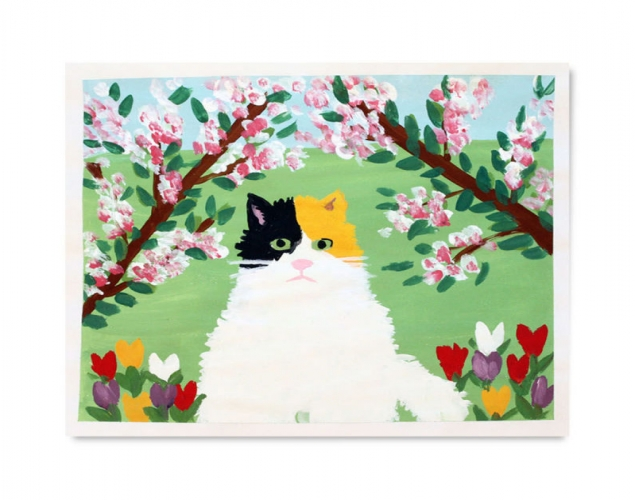
- Make the horizon line high on the page the way Maud Lewis did.
- Paint the sky and the grass in colours that Maud Lewis might have used.
- Set the painting aside to dry.
3
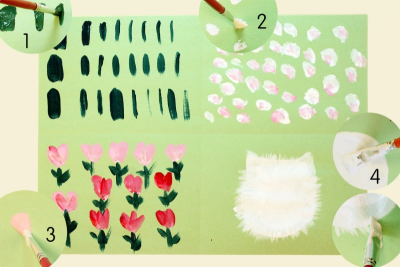
- Fold a piece of construction paper into quarters.
- Practice Maud Lewis brushstrokes while your painting dries.
- In box #1
- short, flat strokes with lots of pressure
- short, flat strokes with medium pressure
- short, flat strokes with light pressure - In box #2
- dab small dots of white paint with the tip of the brush and short, springy brushstrokes
- dab pink paint into the white dots with the tip of the brush and short, springy brushstrokes - In box #3
- use a short, flat brushstroke for one half a tulip
- repeat the brushstroke for the other half
- add short, flat strokes with medium pressure for stems and leaves - In box #4
- paint a large flat circle with cat ears
- use short, light brushstrokes around the edges to make it appear fluffy
4
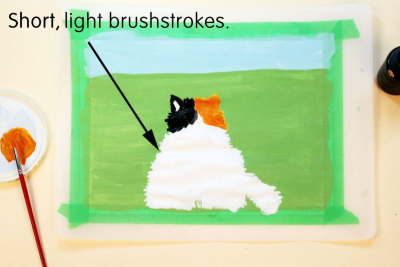
- Choose the colour of cat that you want to paint.
- Paint a large, flat oval for the cat body.
- Add a small, flat rectangle for the tail.
- Paint a round, flat circle for the head and add the cat ears.
- Fill in some of the space between the head and the body.
- Use short, light brushstrokes around the outer edges of the cat to make it look fluffy.
5
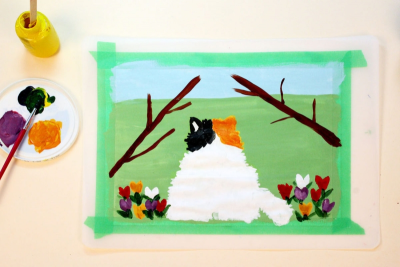
- Paint 2 long, flat brushstrokes with heavy pressure for branches.
- Add short, light brushstrokes for smaller branches.
- Paint tulip brushstrokes in different colours around the cat.
- Add short, flat brushstrokes with medium pressure for the stems and leaves.
6
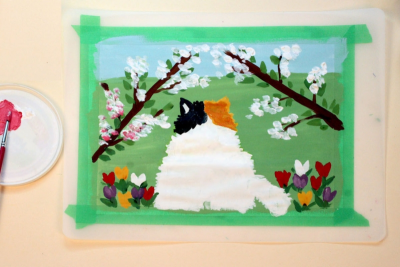
- Dab small dots of white paint with the tip of the brush and short, springy brushstrokes to make the apple blossoms.
- Dab pink dots with the tip of the brush and short, springy brushstrokes into the white dots while the white paint is still wet.
- Add short, flat brushstrokes with medium pressure to make the leaves around the apple blossoms.
7
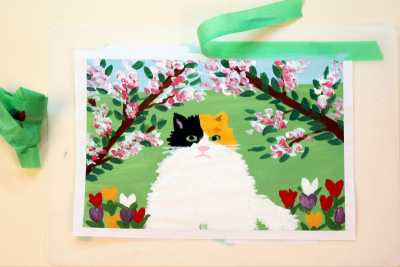
- Add the final details on the face.
- Remember to add short, light brushstrokes to the inside of the ears to make them look fluffy.
- When you are happy with everything, gently remove the tape.
Subjects:
Language Arts,
Social Studies,
Visual Arts
Grades:
Grade 1,
Grade 2,
Grade 3,
Grade 4,
Grade 5,
Grade 6,
Grade 7,
Grade 8

