GEOMETRIC PATTERNS – Islamic Design, Interlaced Ten-Pointed StarStudents create a geometric design using a circle divided into ten equal parts and colour it with metallic coloured pencils.
Students create a geometric design using a circle divided into ten equal parts and colour it with metallic coloured pencils.

Supplies:
- Crayola Metallic Coloured Pencils - 8 Count
- Crayola Washable Glitter Glue - 5 Count
- Pencils
- Rulers
- Erasers
- Black Foam Core Board - 12.7 cm x 12.7 cm (5" x 5") - 1 per student
- Ball Headed Straight Pins - 1 per student
Steps:
1
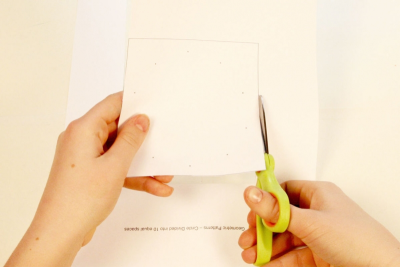
- Use the pattern available in the downloads section of this lesson plan. (Downloads – CircleTenParts.pdf)
- Cut out the pattern so you can easily centre it on your tile.
2
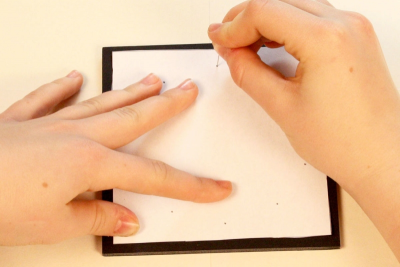
- Centre the pattern on the tile and hold it firmly in place.
- You may want to place a small piece of tape on each corner to keep it from moving. - Use one straight pin to push a small hole through each dot on the pattern.
- There should be 10 holes.
3
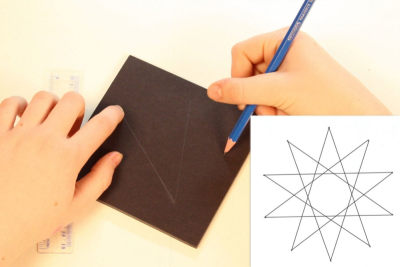
CONSTRUCTION LINES – Drawing the Decagram Grid
- Use a pencil to connect the dots in the following way:
- start at a dot
- count to the 4th dot
- draw a line from the starting dot to that dot
- repeat this until all the dots have been used
- it should be a 10 pointed star
4
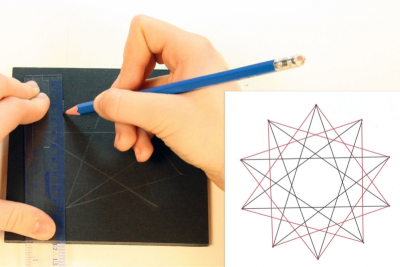
- Use a pencil to connect the dots in the following way:
- start at a dot
- count to the 3rd dot
- draw a line from the starting dot to that dot
- repeat this until all the dots have been used
5
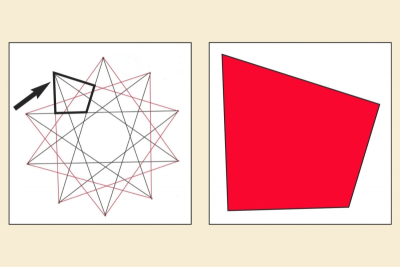
- Look for this polygon.
- Outline it.
6
- Find the same polygon all the way around the decagram grid.
- There should be 10 altogether.
- They overlap.
- Outline them all.
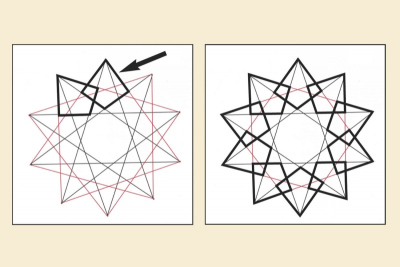
7
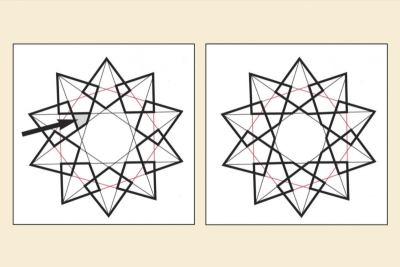
- Find the small polygons that connect the shapes formed by two overlapping polygons.
- Outline them all around the grid.
8
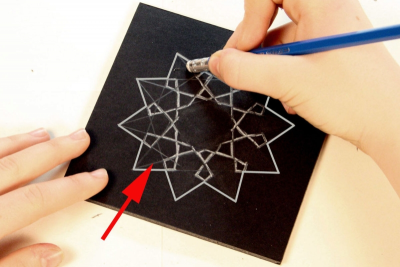
- Erase the decagram grid construction lines.
9
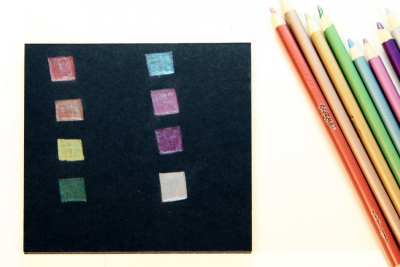
- Test the colours on the back of your tile.
- Choose colours you want to work with to colour your design.
10
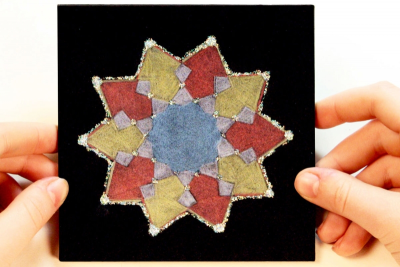
- Colour your design with contrasting metallic colours.
- Do not press too hard or you will stretch the paper.
- Keep colouring soft layers of colour, one on top of the other in different directions until you build up lots of colour.
- Add glitter glue details to create contrast and emphasis.
Subjects:
Language Arts,
Mathematics,
Social Studies,
Visual Arts
Grades:
Grade 5,
Grade 6,
Grade 7,
Grade 8