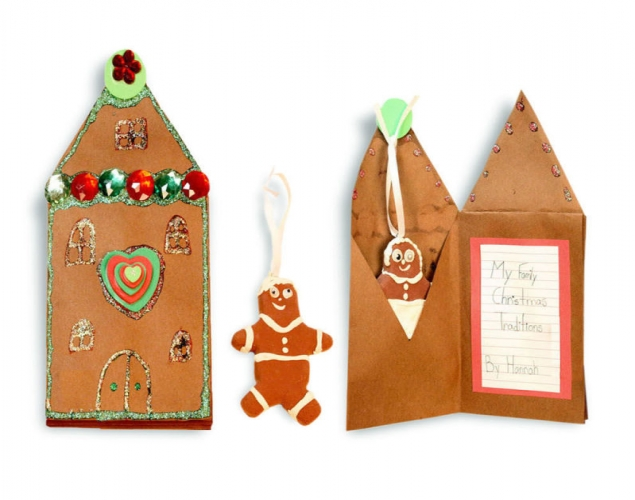
FAMILY HOLIDAY TRADITIONS – Bookmaking, Shape, ContrastStudents use construction paper to create a special, house-shaped book. Then they use Model Magic to create hanging ornaments to insert in the pockets of the book. They use the book to write about a family holiday tradition.
Students use construction paper to create a special, house-shaped book. Then they use Model Magic to create hanging ornaments to insert in the pockets of the book. They use the book to write about a family holiday tradition.
Supplies:
- Crayola Model Magic Classpack - assorted colours
- Crayola Scissors
- Crayola Washable No-Run School Glue
- Crayola Glitter Glue
- Crayola Fine Line Markers - 12 Count
- Crayola Construction Paper - assorted colours
- Copy Paper
- Embellishments
- Bamboo Skewers
- Ribbon
- Pencils
- Small Googly Eyes
- Heavy Weight Construction Paper - 30.5 cm x 45.7 cm (12" x 18")
- Rulers
Steps:
1
PART ONE
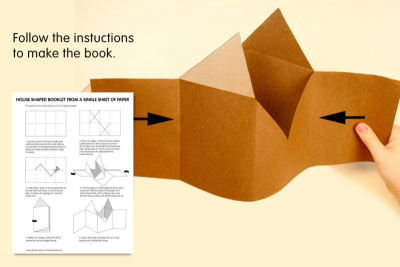
- Choose the colour of paper you want to use for your house.
- Follow the instructions to make the book. (Downloads - HouseBook.pdf)
2
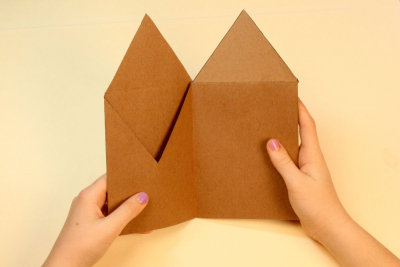
- Flatten the paper and fold it in half to make the book.
3
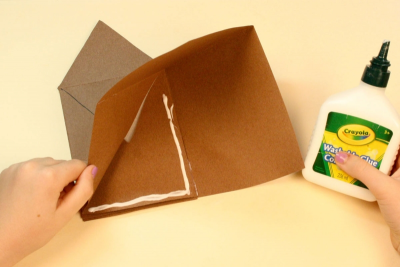
- Place a thin line of glue along the bottom and the openside edge inside the page with the cutout triangle to make a pouch.
- Do not put glue along the edges of the cutout trinagle.
4

- Press the paper together firmly to create a small pouch.
- Repeat with the other cutout triangle page.
5
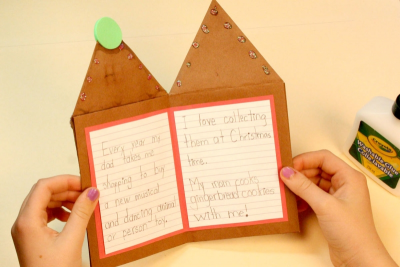
- Glue writing paper on the book pages and write your story on them.
- Decorate the cover.
6
PART TWO
- Decide what shapes you want to make into hanging ornaments to include in your book.
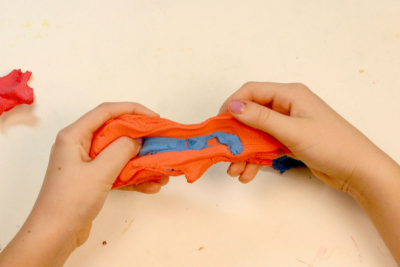
- Mix primary colours of Model Magic to create the colours you need for your shapes.
- red + yellow + blue = brown
- red + blue = violet
- red + yellow = orange
- blue + yellow = green
- add white ot a colour to make it lighter
7
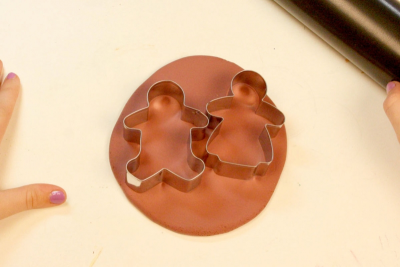
- Use a rolling pin, the barrel of a marker, or a dowel to roll the Model Magic out smooth and flat.
- Make your own shapes or use cookie cutters to cut out 2 shapes.
8
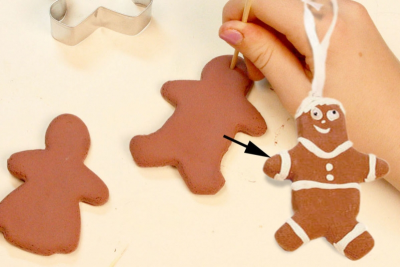
- Use a bamboo skewer to make small holes at the top of the shapes.
- Decorate the shapes with more Model Magic.
- Allow them to dry for 2 days.
- Insert a ribbon or string into the hole and tie it in a loop
9
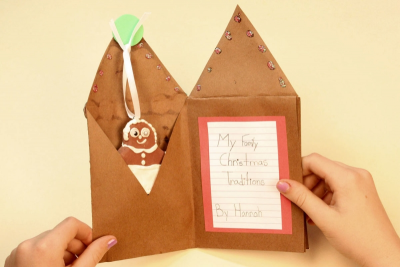
- Place a Model Magic hanging ornament in each pouch.
- Give the book to someone special.
Subjects:
Language Arts,
Mathematics,
Social Studies,
Visual Arts
Grades:
Grade 1,
Grade 2,
Grade 3,
Grade 4,
Grade 5