Supplies:
- Crayola Oil Pastels - 16 Count
- Crayola Marker & Watercolour Paper - 22.9 cm x 30.5 cm (9" x 12")
- Toothpicks
- Paper Towels
- Small Pieces of Sponge - 2 cm x 3 cm (¾" x 1")
Steps:
1
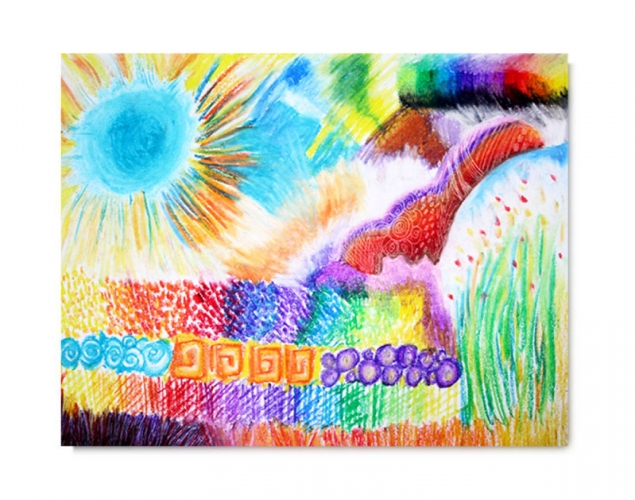
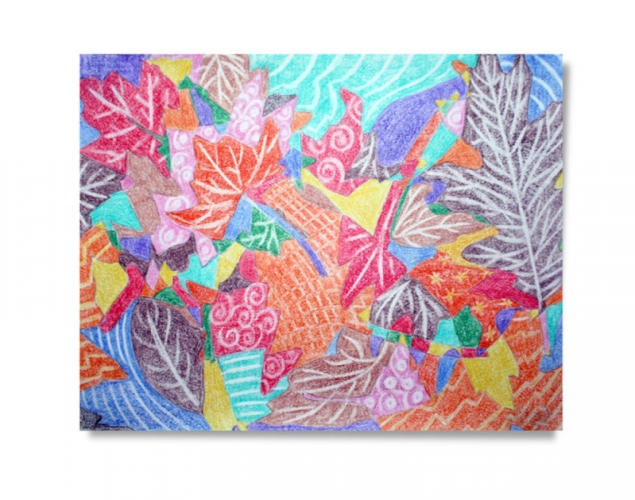
Use all the colours in your oil pastel box in one way or another.
Experiment with ways to apply colour and texture.
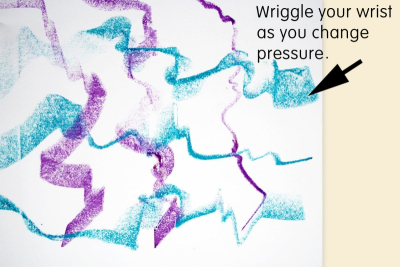
Applying Pressure
- Draw with the oil pastel and deliberately change the pressure to get different effects.
- Wiggle your wrist as you change the pressure.
2
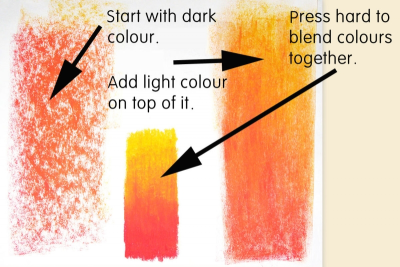
Blending
- Choose two or more colours.
- Colour a section with the darkest colour.
- Colour on top of the first layer with the next lightest colour.
- Press hard to mix the colours.
3
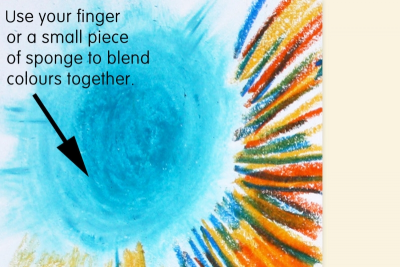
Blending
- Use your finger or a small piece of sponge to blend the colours together.
4
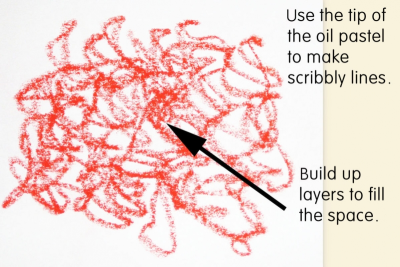
Scumbling
- Use the tip of the oil pastel.
- Draw lightly with a loose, rounded, scribbling motion.
- Build up layers to fill the space.
- Scumble directly on the paper or lay down a base coat colour first and then scumble over it.
5
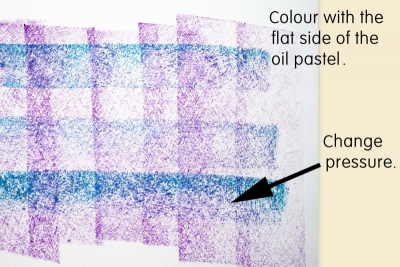
Laying Flat Colour
- Remove the wrapper from the oil pastel.
- Lay the pastel flat on the paper and move it across the surface.
- Change the pressure to get different effects.
6
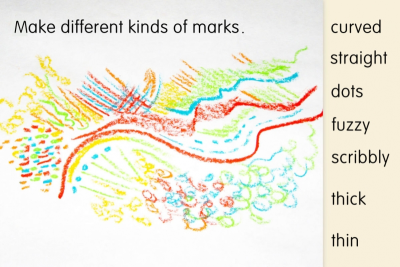
Mark Making
- Use the tip of the oil pastel.
- Explore ways to make different marks.
- Try dots, straight, curved, hatched and scribbled marks.
7
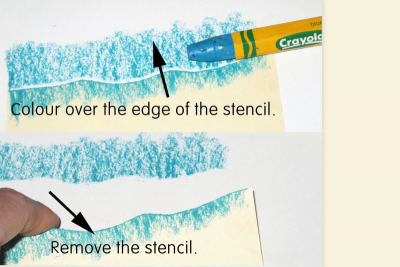
Stencil
- Cut a pattern along the edge of a piece of heavy paper to use as a stencil.
- Hold the stencil firmly in place.
- Colour over the edge of the stencil onto the paper.
- Remove the stencil.
8
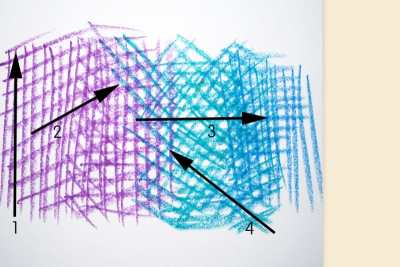
Cross-Hatching
- Draw a series of thin lines beside each other.
- Draw a new set of lines on an angle over top of the first set of lines.
- Use the same colour for each set of lines or change colours for a different effect.
9
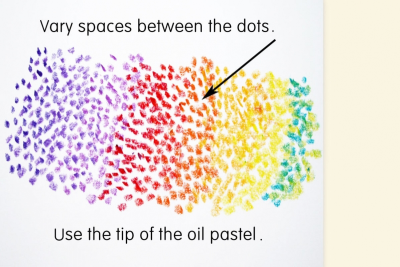
Stippling
- Draw a series of dots beside each other.
- Vary the spaces between the dots to change the intensity of the colour.
- Draw different coloured dots among the first set to shift from one colour to the next.
10
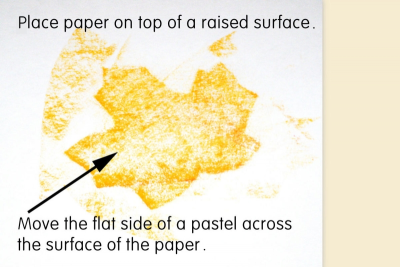
Rubbing
- Place a piece of paper on top of a raised surface.
- Move the flat side of an oil pastel across the surface of the paper.
11
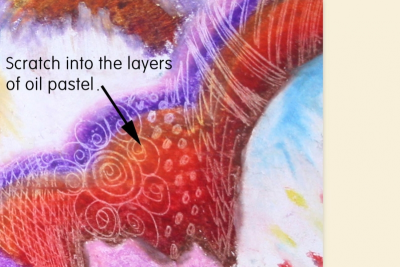
Sgraffito (Scratching into the oil pastel)
- Apply thick layers of oil pastel.
- Use a toothpick or other pointed tool to scratch into the layers of oil pastel.
- Create a variety of patterns.
12
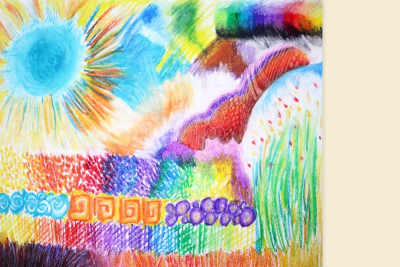
- Fill the entire page with colour and texture.
Subjects:
Grades:
Grade 3,
Grade 4,
Grade 5,
Grade 6,
Grade 7,
Grade 8,
Grade 9,
Grade 10