Supplies:
- Crayola Fabric Markers
- Crayola Fabric Crayons
- Crayola Washable Glue Sticks
- Crayola Scissors
- Iron
- Masking Tape
- Newsprint Paper - 22.9 cm x 30.5 cm (9" x 12")
- Bristol Board - 25 cm x 25 cm (10" x 10") - 1 piece per student
- Polyester Cotton Fabric - 20 cm x 20 cm (8" x 8") - 1 piece per student
Steps:
1
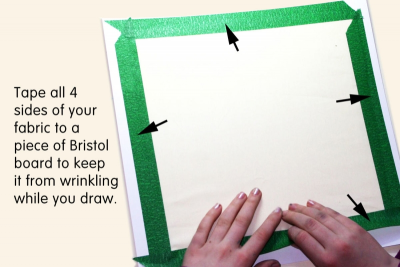
- Tape the fabric to a piece of Bristol board.
- Make sure you put tape on all four sides and pull the fabric tight.
- This will keep it from wrinkling while you draw.
2
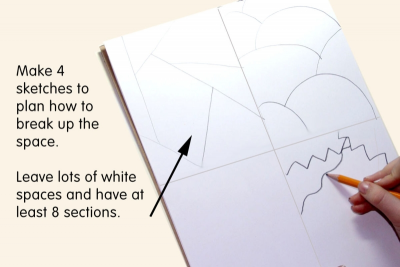
- Make 4 sketches on a piece of paper, or in your sketchbook to plan how you want to break up the space.
- Leave lots of white space and have at least 8 sections.
3
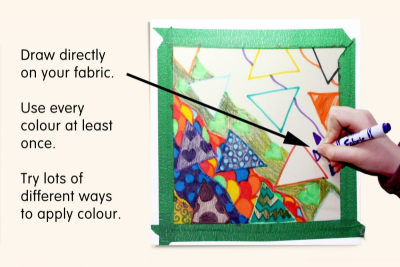
- Choose the plan you like best, or change it slightly.
- Work directly on your fabric.
- Begin by outlining the largest areas.
- Remember to use every colour at least once.
- Try lots of different ways to apply the colour.
- Notice what happens when you change the pressure.
4
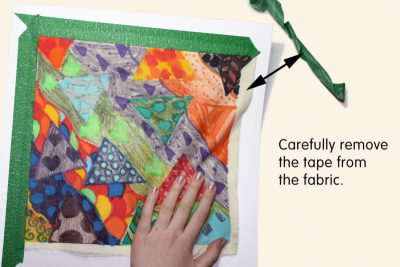
- Carefully remove the tape from the fabric when you are finished colouring the whole design.
5
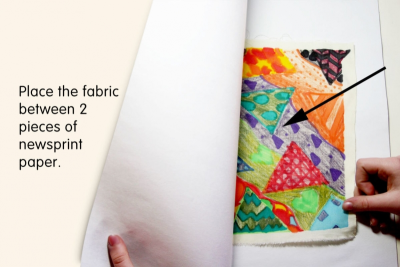
- Place the design between two pieces of newsprint paper.
6
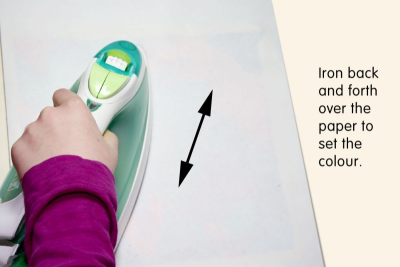
- Set the iron to the synthetic setting NO STEAM.
- Slowly iron back and forth over the paper to set the colour.
- You will notice some of the wax from the crayons absorbs into the paper.
- Do not allow the paper to move or the design may smear.
- Keep changing the newsprint paper until no more wax shows through.
7
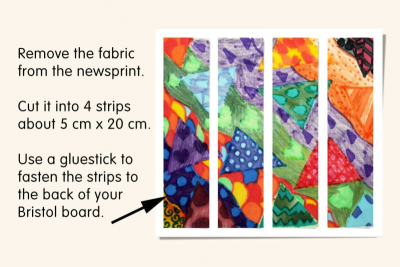
- Remove the fabric from the newsprint paper.
- Notice how the colours have changed.
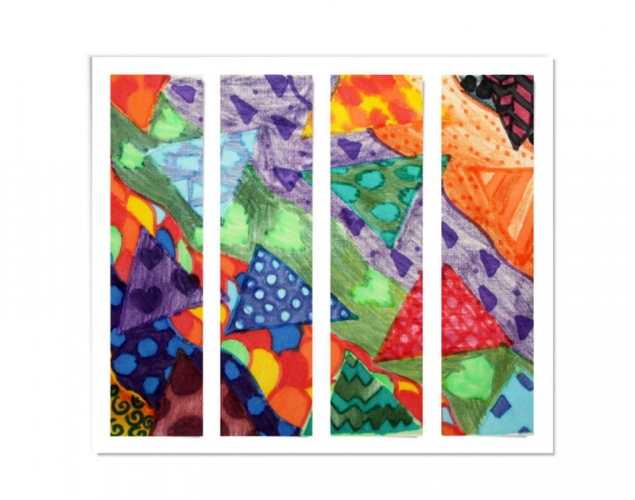
- Cut the fabric into 4 strips about 5 cm x 20 cm.
- Use a gluestick to fasten the strips beside each other on the back of your Bristol board.
- Leave a small space about 1 cm wide between each strip.
- View the work with fresh eyes.
- What colours do you like the best? Why?
- How is the marker colour different than the crayon colour?
- What did you learn about working with fabric markers and fabric crayons?
Subjects:
Grades:
Grade 1,
Grade 2,
Grade 3,
Grade 4,
Grade 5,
Grade 6,
Grade 7,
Grade 8