Supplies:
- Crayola Watercolour Paints
- Crayola Paint Brushes
- Crayola Coloured Pencils
- Crayola Washable Glue Sticks
- Crayola Sketchbooks
- Crayola Scissors
- Rulers
- Pencils
Steps:
1
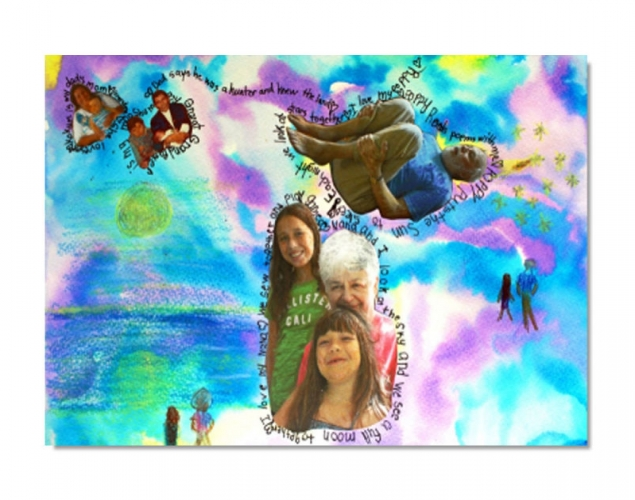
- Summarize your research about endangered pollinators.
- Decide on what message you want to communicate.
- Brainstorm ideas in your sketchbook.
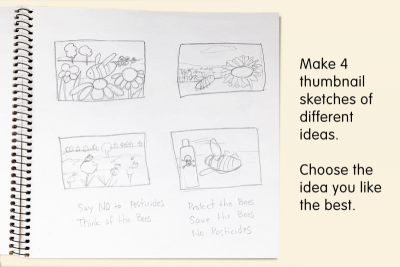
- Make 4 thumbnail sketches of different ways to communicate your message.
- Choose the idea you like the best.
2
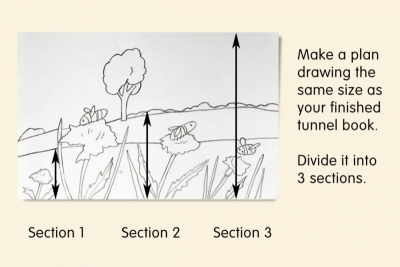
- Make a plan drawing the same size as your finished tunnel book.
- Divide it into 3 sections – the foreground, middle plus background, and sky.
- Trace each section onto a piece of cardstock paper.
3
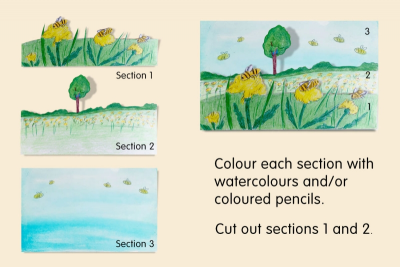
- Colour each section with watercolours and/or coloured pencils.
- Cut out sections 1 and 2 - the foreground and middle plus background.
- Place the sections in order to see how they line up.
- Add more details and contrast to add emphasis to important areas.
4
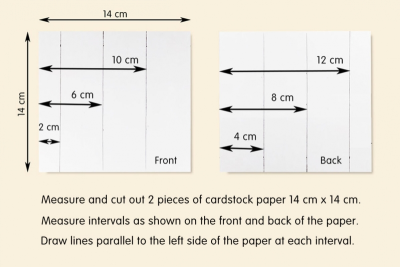
- Measure and cut out 2 pieces of cardstock paper 14 cm x 14 cm.
- Measure intervals 2 cm, 6 cm and 10 cm from the left side of the paper.
- Draw lines parallel to the left side of the paper at each interval.
- Turn the paper over.
- Place it face down with the 2 cm line on the left.
- Measure intervals 4 cm, 8 cm and 12 cm from the left side of the paper.
- Draw lines parallel to the left side of the paper at each interval.
- Repeat for the 2nd piece of paper.
5
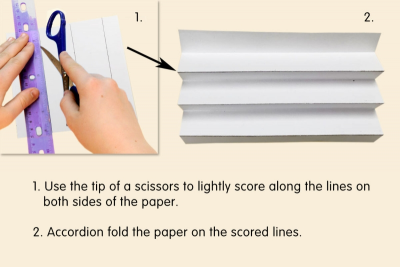
- Use the tip of a scissors to lightly score along the lines on both sides of the paper.
- Accordion fold the paper on the scored lines.
6
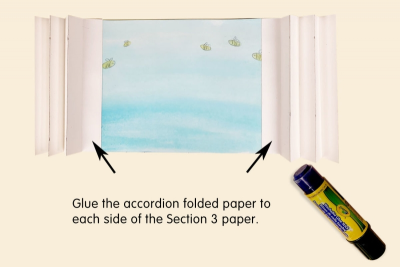
- Glue the accordion folded paper to each side of the Section 3 paper – the sky.
7
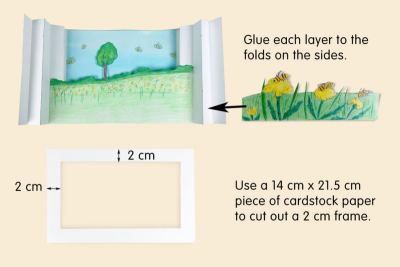
- Glue each layer to the folds on the sides.
- Use a 14 cm x 21.5 cm piece of cardstock paper to cut out a 2 cm frame.
8
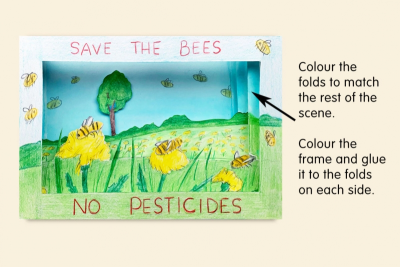
- Colour the folds to match the rest of the scene.
- Colour the frame and glue it to the folds at the side.
- View your tunnel book with fresh eyes.
- Does it have a sense of depth?
- Does it show technical accomplishment? How?
- Does it communicate your intended message? How?
- What do you like best about your book?
Subjects:
Language Arts,
Mathematics,
Science,
Visual Arts,
Media Literacy
Grades:
Grade 7,
Grade 8,
Grade 9