Supplies:
- Cardboard Boxes and Container Lids
- Rubber Bands
- Bamboo Skewers
- Crayola Glitter Paint
- Crayola Tempera Paint
- Crayola Paint Brushes
- Crayola Scissors
- Crayola White Glue
Steps:
1
WHEELS
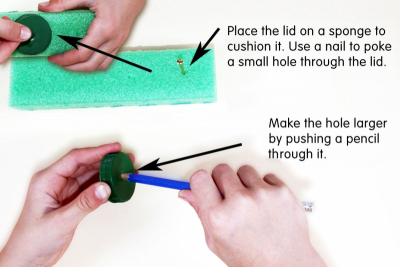
- Place a small plastic lid on a sponge to cushion it.
- Use a nail to poke a small hole through the centre of the lid.
- Make the hole bigger by pushing a pencil through it.
- Repeat this for 3 more lids.
2
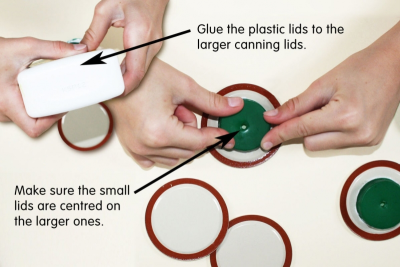
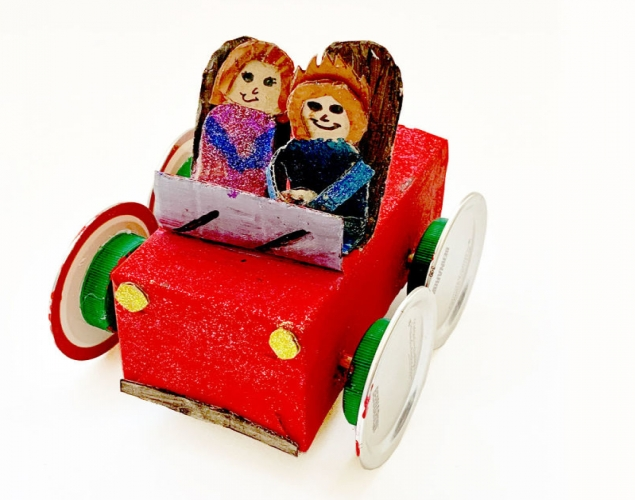
- Glue a small plastic lid to a bigger canning lid.
- Make sure the small lid is centred on the canning lid.
- Have the top of the small lid facing up.
- Repeat for the other 3 small lids.
- Place the wheels aside to dry.
3
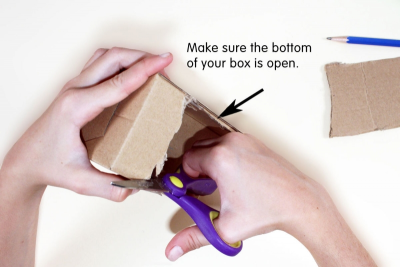
CAR BODY
- Use a sturdy box for the body.
- Make sure the bottom of the box is open.
4
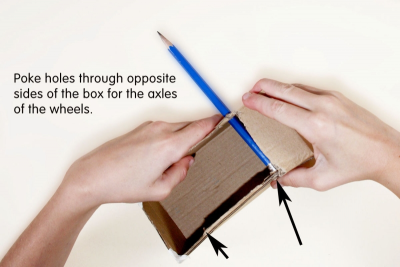
- Poke holes through opposite sides of the box for the axles of the wheels.
- Make sure the holes are big enough for the axles to turn smoothly.
5
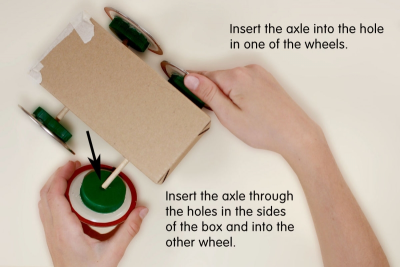
- Insert the axle into the hole in one of the wheels.
- Insert the axle through the holes in the sides of the box and into the other wheel.
6
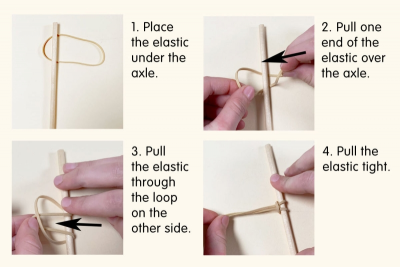
- Loop the elastic around the rear axle.
- Place the elastic under the axle.
- Pull one end of the elastic over the axle.
- Pull the elastic through the loop on the other side.
- Pull the elastic tight.
7
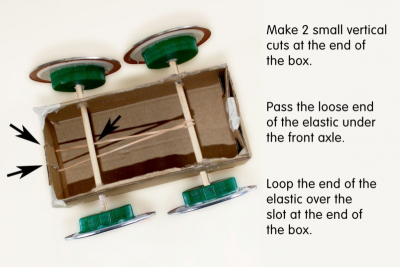
- Make 2 small vertical cuts at the end and in the middle of the small box to make a slot for the elastic.
- Pass the loose end of the elastic under the front axle.
- Loop the end of the elastic over the slot at the end of the box.
- Tape the slot in place.
8
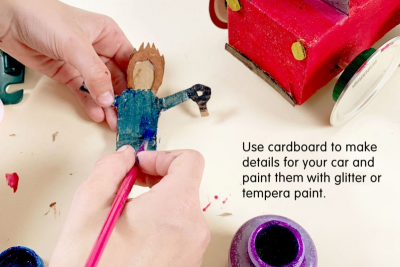
- Use cardboard to make details for your car and paint them with glitter or tempera paint.
9
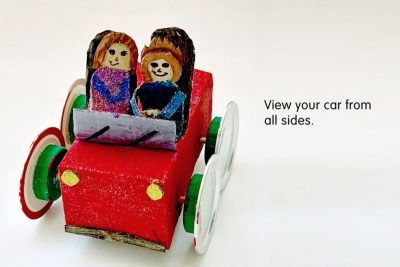
- View your car from all sides.
- See how far your car will go.
- Explain how the energy to move the car is created.
Subjects:
Language Arts,
Science,
Visual Arts
Grades:
Grade 4,
Grade 5,
Grade 6,
Grade 7,
Grade 8

