Supplies:
- Crayola Air Dry Clay - 1.13 kg white - 1 per 3 students
- Crayola Paint Brushes
- Crayola Watercolour Paints
- Crayola Sketchbooks - 1 per student
- Pencils - 2 per student
- Masking Tape
- Paperclips - 2 per student
Steps:
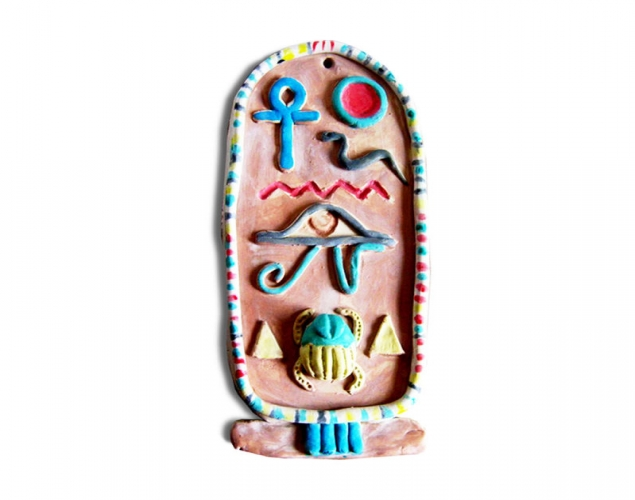
1

- Choose symbols for the cartouche based on composition not meaning.
- Make several practice drawings of hieroglyphics.
- Pay particular attention to the use of space, details and overall balance.
2
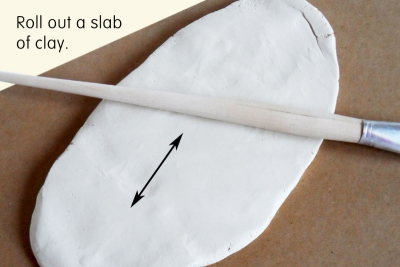
- Work on a piece of light cardboard or a plastic placemat.
- Use a rolling pin, piece of dowel or paint brush handle to roll out enough clay to make the cartouche.
3

- Use a pin tool to cut out the shape of the cartouche.
- Make a pin tool by taping an open paper clip to a pencil. - Roll out a long coil for the border and the base of the cartouche.
- Score and slip the coil onto the slab of clay. (See the Score and Slip lesson plan available on this website.)
4
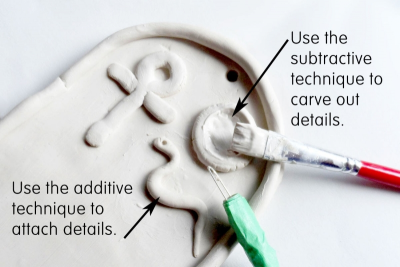
- Roll balls and coils of clay to form hieroglyphics.
- Use the additive technique to attach these pieces.
- Remember to score and add slip each of these pieces to join them to the clay. - Make a carving tool by taping a closed paper clip to a pencil.
- Use subtractive technique to carve out hieroglyphic details from the clay.
5
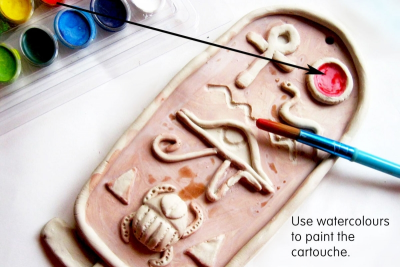
- Allow the clay to dry for about 48 hours.
- Once the clay is dry, use watercolour paints to add a few colours to the cartouche.
6
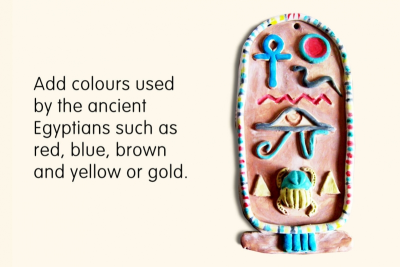
- Add colours used by the ancient Egyptians such as red, blue, brown and yellow or gold.
- View your cartouche with fresh eyes.
- Does it look authentic?
- What do you see that makes you say that?
- What did you do to balance the composition?
- What do you like best about your work?
Subjects:
Language Arts,
Social Studies,
Visual Arts
Grades:
Grade 7,
Grade 8,
Grade 9,
Grade 10