Supplies:
- Crayola Modeling Clay - Jumbo Pack
- Bamboo Skewers
- Pencils
- Toothpicks
Steps:
1
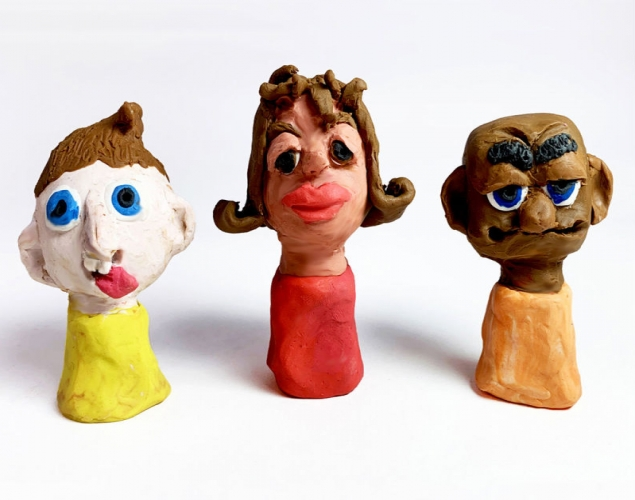
- Make 3 character heads with different and distinct personality traits.
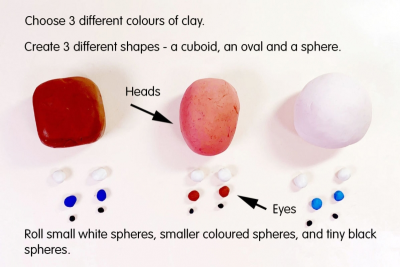
- think of features you can make to show each character's personality traits - Choose 3 different colours of clay.
- Create 3 different shapes for the heads – a cuboid, an oval and a sphere.
- Roll small white spheres, smaller coloured spheres and tiny black spheres of clay for the eyes - 2 sets for each head.
2
- Place the white spheres where the eyes should go.
- Press them flat.
- Place the coloured spheres on top of the white circles.
- Press them flat.
- Place the tiny black spheres on top of the coloured circles.
- Press them flat.
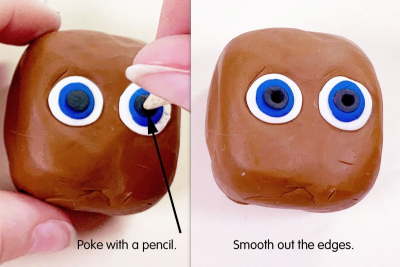
- Poke the black circles with a skewer or pencil.
- Smooth out the edges.
3
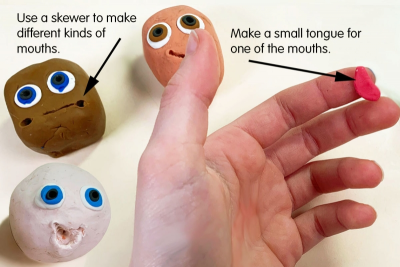
- Use a skewer to make different kinds of mouths.
- make mouths that suit the characters' personalities - Press a small piece of clay flat.
- Shape it into a small tongue for one of the mouths.
4
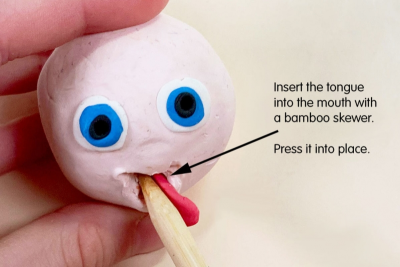
- Insert the tongue into the mouth with a bamboo skewer.
- Press it into place.
5
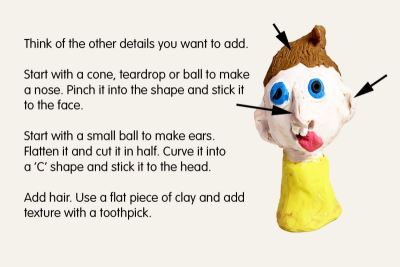
- Think of other details you want to add.
- Make sure they suit the personality traits of your character.
NOSE:
- Start with a small cone, teardrop or ball of clay.
- Pinch it into the shape you want.
- Stick it to the face.
EARS:
- Start with a small ball of clay.
- Flatten it and cut it in half.
- Curve it into a 'C' shape.
- Stick it to the side of the head.
HAIR:
- Use a flat piece of clay.
- Place it on the head in a style that suits your character.
- Add texture with a toothpick.
Subjects:
Language Arts,
Mathematics,
Visual Arts,
Media Literacy
Grades:
Grade 4,
Grade 5,
Grade 6,
Grade 7,
Grade 8,
Grade 9