Supplies:
- Crayola Construction Paper
- Crayola Washable Glue Stick
- Crayola Washable No-Run School Glue
- Crayola Scissors
- Crayola Fine Line Markers
- Crayola Crayons
- Cereal Box - 1 per student
- Paper Towel Rolls - 2 per student
- Masking Tape
- Craft Sticks - 4 per student
Steps:
1
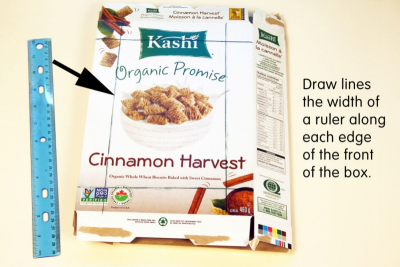
- Unfasten the ends of the cereal box and flatten it.
- Draw lines the width of a ruler along each edge of the front of the box.
2
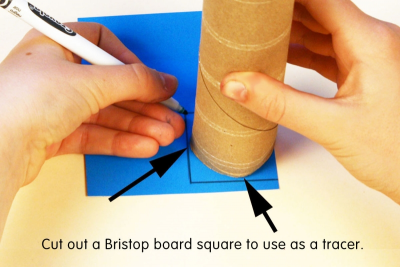
- Place the end of a paper towel roll on top of a small piece of Bristol board.
- Draw a square that touches the edges of the circle on the Bristol board.
- Cut out the Bristol board square to use as a tracer.
3
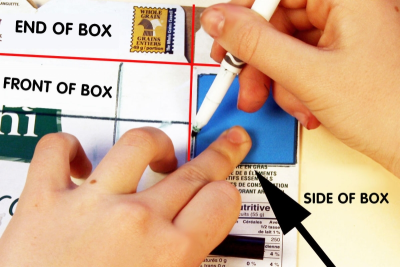
- Place the tracer on the long side of the box close to the end.
- Trace around the square to mark where the paper towel roll will go.
- Repeat this process on each end of both long sides of the box.
- You should trace 4 squares altogether.
4
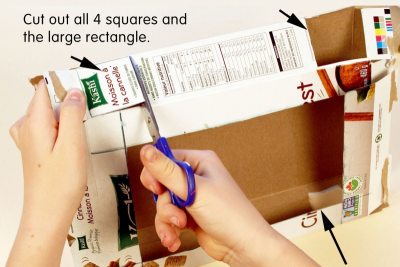
- Carefully cut out all 4 squares and the large rectangle.
5
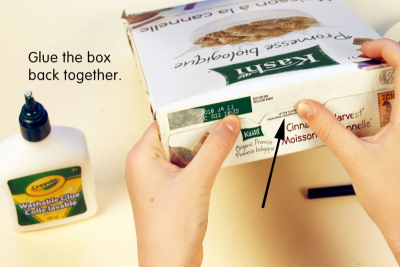
- Glue the box back together.
6
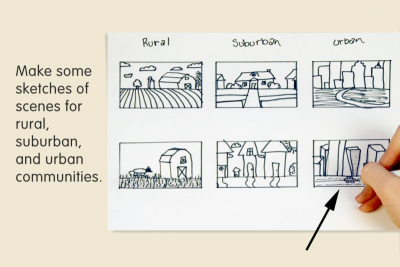
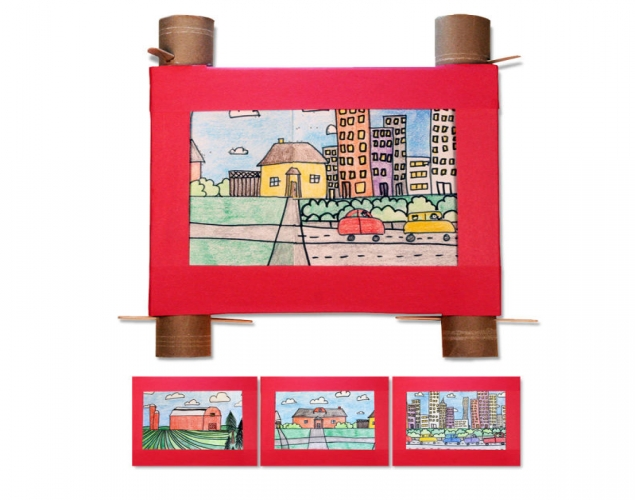
- Make several thumbnail sketches of scenes for rural, suburban and urban communities.
- Choose the ones you like best.
7
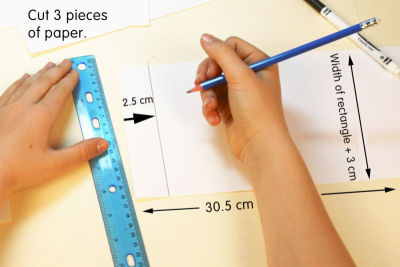
- Measure the width of the rectangle in your box.
- Add 3 cm to this measurement.
- This will be the width of the paper you use for your drawings.
- Cut 3 pieces of paper the width x 30.5 cm.
- Draw lines 2.5 cm in from each end of one piece of the paper parallel to the short ends of the paper.
- This is where you will put the glue to attach the other 2 scenes.
- Use this paper for the (middle) suburban scene.
- Do not colour in these end spaces.
8
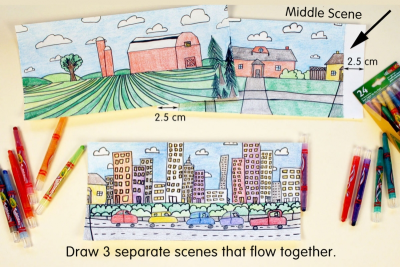
- Draw 3 separate scenes – rural, suburban, and urban.
- Add details to your drawing to make sure the scenes flow smoothly from one to the other.
- Outline them with a black fine line marker.
- Colour them with Crayola Twistables crayons.
9
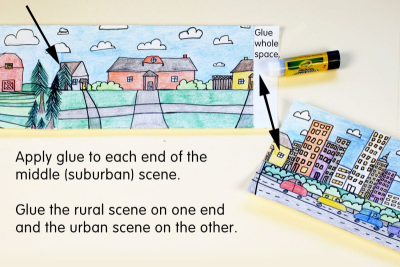
- Apply glue to the spaces at each end of the suburban scene.
- Glue the rural scene on one end, and the urban scene on the other end of the suburban scene.
10
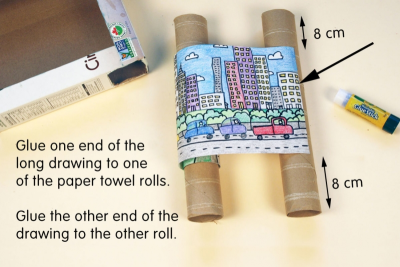
- Glue one end of the long drawing to one of the paper towel rolls.
- Leave spaces of about 8 cm long at the top and bottom of the roll.
- Glue the other end of the drawing to the other paper towel roll.
- Gently turn one paper towel roll to wrap the drawing around it.
11
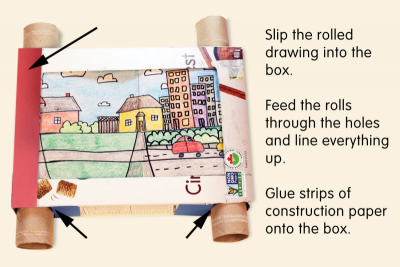
- Slip the rolled drawing into the box.
- Feed the paper towel rolls through the holes and line everything up.
- Make sure the paper towel rolls fit snuggly in the holes.
- If the holes are too big, glue small pieces of Bristol board to the sides of the box so they touch the rolls.
- Glue strips of construction paper onto the front and sides of the box.
12
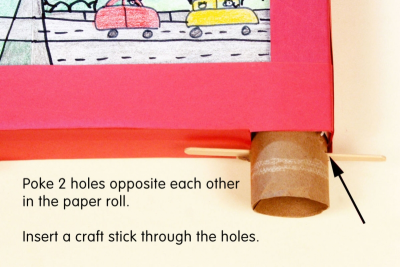
- Poke 2 holes through the paper towel roll opposite each other and close to the edge of the box.
- Insert a craft stick through the holes as shown.
- Repeat for each end of both paper towel rolls.
- The craft sticks will keep the rolls from slipping up and down.
13
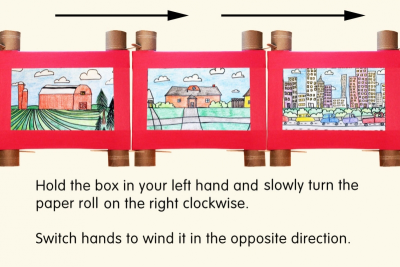
- Hold the box in your left hand and slowly turn the paper roll on the right clockwise to view all the scenes.
- Switch hands to wind it in the opposite direction.
Subjects:
Language Arts,
Mathematics,
Social Studies,
Visual Arts
Grades:
Grade 2,
Grade 3,
Grade 4,
Grade 5,
Grade 6

