Supplies:
- Crayola Marker & Watercolour Paper - 20.9 cm x 30.5 cm (9" x 12")
- Crayola Glitter Paint
- Crayola Paint Brushes
- Crayola Scissors
- Crayola Markers
- Paper Towel Rolls - ½ per student
- Yarn or Ribbon
- Hole Punch
- Cardstock Paper - 21.6 cm x 27.9 cm (8.5" x 11")
- Tape
- Paper Towels
Steps:
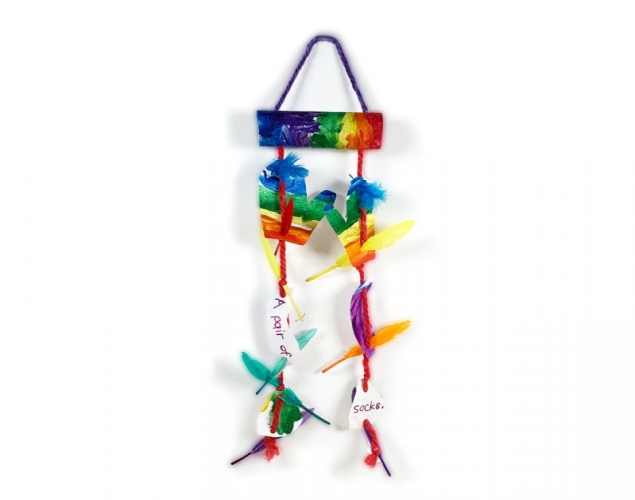
1
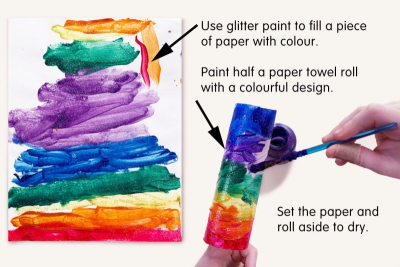
- Use glitter paint to fill a piece of paper with colour.
- Paint half a paper towel roll with a colourful design.
- Set the paper and roll aside to dry.
2
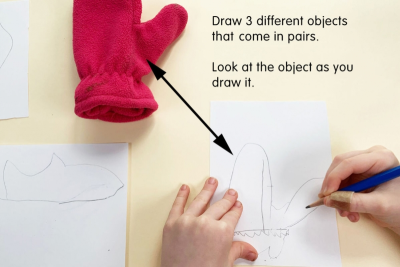
- Draw 3 different objects that come in pairs on pieces of 14 cm x14 cm cardstock paper.
- mittens
- shoes
- socks - Look at the objects as you draw them.
3
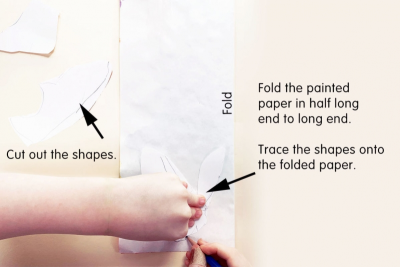
- Cut out the shapes.
- Use the shapes as tracers.
- Fold the painted paper in half long end to long end.
- Trace the shapes onto the folded paper.
4
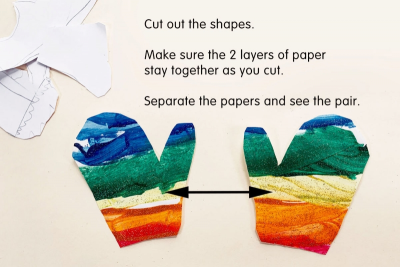
- Cut out the shapes.
- Make sure the 2 layers of paper stay together as you cut.
- Separate the papers and see the pair.
5
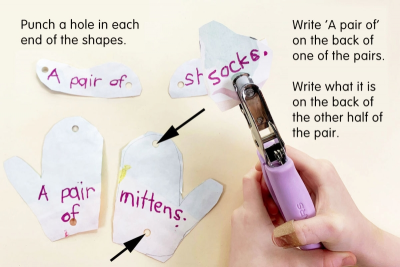
- Use a hole punch to make a hole in each end of the shapes.
- Write 'A pair of' on the back of one of the pairs.
- Write what it is on the back of the other half of the pair.
6
- Cut 2 pieces of yarn about 40 cm long.
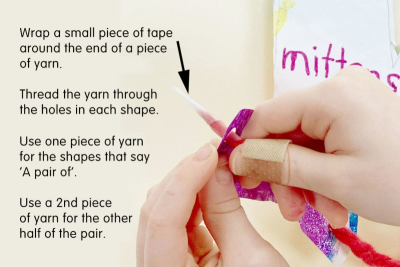
- Tightly wrap a small piece of tape around one end of each piece of yarn.
- Thread the yarn through the holes in the shapes.
- Use one piece of yarn for the shapes that say 'A pair of'.
- Use the 2nd piece of yarn for the other half of the pair.
7
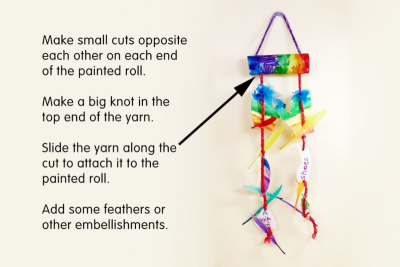
- Make small cuts opposite each other on each end of the painted roll.
- Make a big knot in the top end of each piece of yarn.
- Slide the yarn along the cut to attach it to the painted roll.
- Add some feathers or other embellishments.
- Hang your colourful pairs where they can move in the air.
Subjects:
Language Arts,
Mathematics,
Visual Arts
Grades:
Kindergarten,
Grade 1