Supplies:
- Crayola Fabric Markers
- Crayola Scissors
- Crayola Glue Sticks
- Crayola Glitter Glue
- Onion Skin Tracing Paper - 22.9 cm x 30.5 cm (9" x 12") - 1 piece per student
- White Bristol Board - 30.5 cm x 3o.5 cm (12" x 12") - 1 piece per student
- Polyester Cotton Fabric - 25 cm x 25 cm (10" x 10") - 1 piece per student
- Masking Tape
- Bamboo Skewers - 1 per student
- Yarn or Ribbon
- Iron
- Blank Newsprint Paper
Steps:
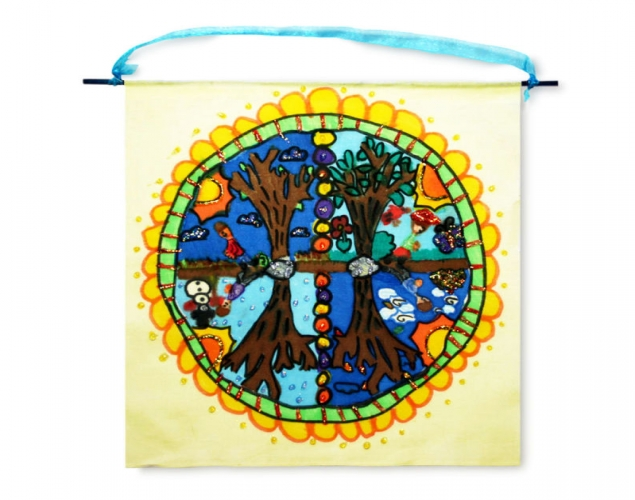
1
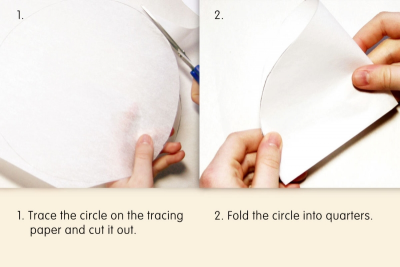
- Use the template to trace the circle on the tracing paper.
- Cut out the circle.
- Fold the circle into quarters.
2
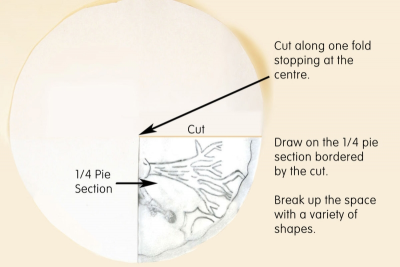
- Open the circle and cut along one of the folds.
- Stop at the centre.
- Draw on the 1/4 pie section bordered by this cut.
- Break up the space with a variety of shapes. - Fold this section under the paper and trace the design onto the next 1/4 pie section.
- Unfold the paper.
- The quarter section is a mirror image of your original design.
3
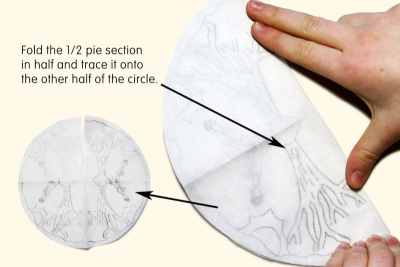
- Fold the 1/2 pie section in half and trace it onto the other half of the paper to complete the entire circle.
- You may want to outline the design in marker to make it easier to see.
4
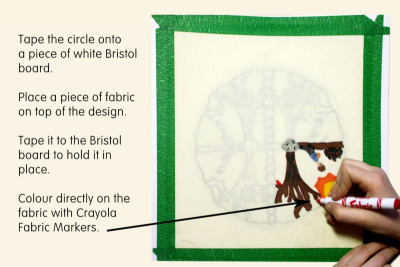
- Tape the circle design onto a piece of white Bristol board.
- Place a piece of fabric on top of the design.
- Tape it to the Bristol board to hold it in place.
- Use a small scrap of fabric to test the way the Crayola Fabric Markers will look on your fabric.
- Trace the drawing and colour it with the fabric markers.
- Colour directly on the fabric.
5
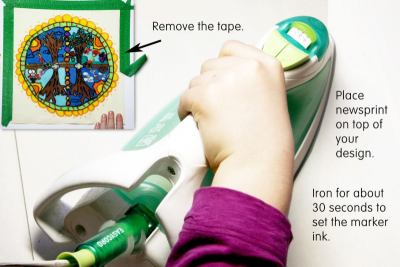
- Place several layers of blank newsprint on top of layers of newspaper to make an ironing pad.
- Remove all the tape and the fabric from the Bristol board.
- Place the fabric on top of the ironing pad with the good side facing up.
- Place a piece of blank newsprint on top of the fabric.
- Set the iron to cotton.
- Gently run the iron back and forth over the paper for about 30 seconds making sure to cover the entire design.
- This will to set the marker ink and make it permanent. - Remove the paper.
6
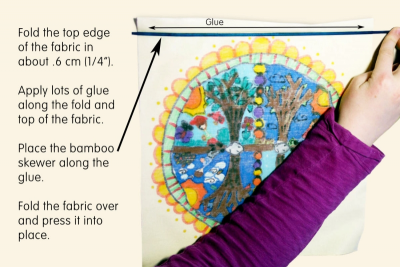
- Place the fabric on your desk with the good side facing down.
- Fold the top edge of the fabric in about .6 cm (1/4").
- Apply lots of glue along the fold and top of the fabric.
- Place a bamboo skewer along the glued surface.
- Fold the fabric over and press it into place to secure the skewer.
7
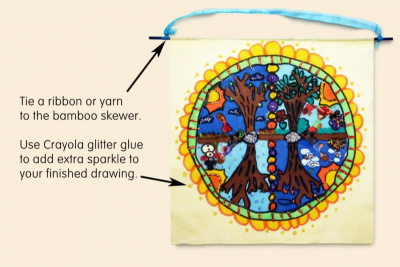
- Tie a piece of yarn or ribbon to each end of the bamboo skewer.
- Use Crayola glitter glue to add extra sparkle to your finished drawing.
Subjects:
Grades:
Grade 4,
Grade 5,
Grade 6