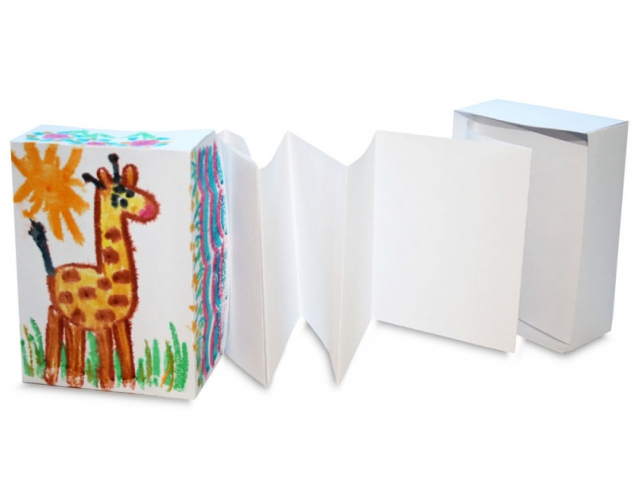
BOOK IN A BOX – Monotype PrintmakingStudents create an accordion-folded book in a small box with a cover they have decorated with a monotype print.
Students create an accordion-folded book in a small box with a cover they have decorated with a monotype print.
Supplies:
- Crayola Broad Line Markers
- Crayola Marker & Watercolour Paper - 22.9 cm x 30.5 cm (9" x 12")
- Crayola Glue Sticks
- Cardstock Paper - 21.6 cm x 27.9 cm (8.5" x 11") - 1 piece per student
- Cardstock Paper - 20.9 cm x 27.3 cm (8.25" x 10.75") - 1 piece per student
- Plastic Sheet (overhead transparency or file folder cut to size) - 21.6 cm x 27.9 cm (8.5" x 11") - 1 per student
- Rulers
- Pencils
- Water Containers
- Small Pieces of Sponge - about 3 cm x 3 cm (1.25" x 1.25")
Steps:
1
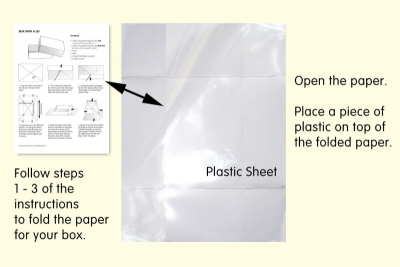
- Follow steps 1 - 3 of the instructions to fold the paper for the TOP of your box. (Downloads - LargeBox.pdf)
- Open up all the folds and place the paper on your desk with the 'X' facing down.
- Place the plastic sheet on top of the folded paper.
- Make sure it lines up with the outer edges of the paper.
2
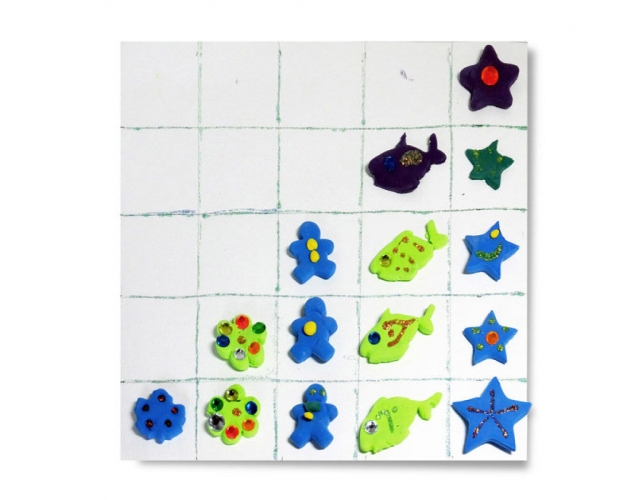
- Make 4 thumbnail sketches of possible designs for your book cover.
- Choose the design you like best.
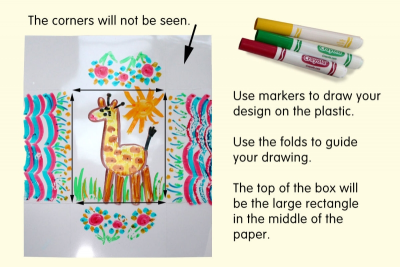
- Use markers to draw your design on the plastic sheet.
- If you make a mistake you can remove it with a damp tissue.
- The folds have created lots of rectangles.
- the 4 outside corners will not show once the box is made
- the top of the box will be the large rectangle in the middle of the paper
- the sides of the box will be the outside, middle rectangles
3
- Place the paper with the 'X' facing down.
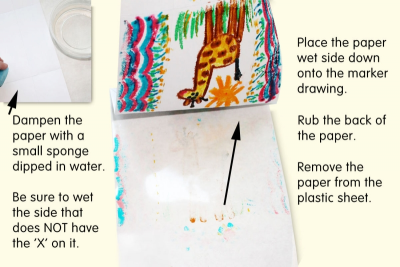
- Dampen the paper with a small sponge dipped in water.
- do not get it too wet - Make sure the drawing has the marker side facing UP.
- Place the dampened paper on top of the marker drawing.
- Gently rub the entire surface of the paper.
- Remove the paper from the plastic sheet.
4
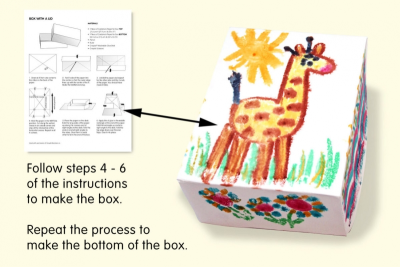
- Follow steps 4 - 6 of the instructions to finish making the box.
- Repeat the process to make the bottom of the box using the smaller piece of cardstock paper.
- do not decorate the bottom of the box
5
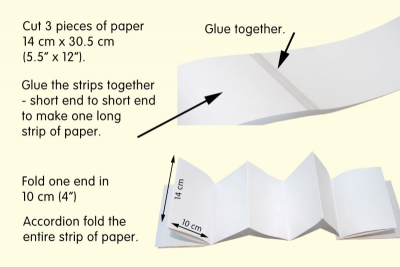
- Cut 3 pieces of paper into 14 cm x 30.5 cm strips.
- Glue the strips together short end to short end to make one long strip of paper.
- Fold one end of the long strip of paper in 10 cm (4").
- Continue making uniform accordion folds until the entire strip is folded.
6
- Use the folded paper to record a story or research.
- Add pictures and diagrams.
- Complete all the written work before gluing the book together.
- When you are satisfied with your work glue the paper into the box.
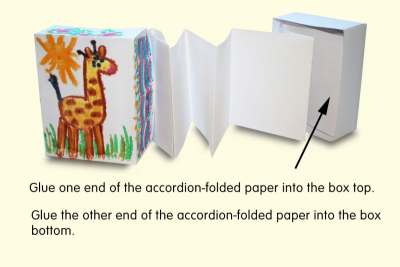
- Glue one end of the accordion-folded paper into the the box top.
- Glue the other end of the accordion-folded paper into the box bottom.
Subjects:
Grades:
Grade 1,
Grade 2,
Grade 3,
Grade 4,
Grade 5,
Grade 6